Showing posts with label lunch. Show all posts

Thursday, August 12, 2010

Coconut Curry Vegetable Wrap

   Every time I go to P.F. Chang's, I get the same thing:  the coconut curry vegetables.  We actually stopped there last Sunday on our drive home, but I couldn't really enjoy my dinner as Meghan was at the end of her rope by this point (we'd been driving in the car ALL DAY).  Since then, the flavors have been lingering, tempting me to visit the local Chang's establishment to get another coconut curry fix. Instead, I decided to try to recreate the flavors in my kitchen.  I switched things up a bit and went for a lunch dish.  The dish at P.F. Chang's is a medley of cooked vegetables and stir-fried tofu in a delicious coconut milk based curry sauce.  I wanted raw veggies for my lunch, so I thought of a wrap.   I think this is a great way for me to satisfy my Chang's cravings and can save us a ton of $$!

Coconut Curry Vegetable Wrap 


1/4 large cucumber, sliced and then quartered
1/2 medium red bell pepper, cut into small squares
7 baby carrots, sliced
romaine lettuce
1/4 cup whole cashews
1/4 cup unsweetened coconut milk
1 tsp. reduced sodium tamari
1 tsp. fresh lemon juice
1/8 tsp. ground celery seed
1/8 tsp. ground cumin
1/4 tsp. mild curry powder
sea salt and freshly ground black pepper, to taste
2 whole grain tortillas (I used Smart & Delicious Low Carb High Fiber tortillas)


Prepare your vegetables and place them in a medium bowl.  Set aside.
In a small bowl, mix together the coconut milk, tamari, lemon juice, celery seed, cumin, and curry.  Add sea salt and freshly ground black pepper to taste.  Drizzle the sauce over the vegetables and stir until all the veggies are coated.  Stir in the cashews.  
Place two pieces of the romaine lettuce on a tortilla.  
Top with half of the vegetable mixture.  
Roll the wrap and cut in half.  If you have a lunch buddy, repeat the process with the second tortilla.  Or, if you are like me, put the other half of the mixture in the fridge and you have a quick lunch ready for tomorrow!  

I know what some of you are thinking.  I can't eat something with coconut milk and cashews--too many calories!  Too much fat!  You know who you are.  Please stop.  Let me remind you that our bodies need fat.  And the fat that comes from plant sources is the good kind.  Yes, coconut milk and cashews are calorie-dense foods.  But paired with low-calorie vegetables,  you have a perfectly balanced lunch.  For the curious, I punched this recipe into my handy-dandy Mac Gourmet program and got the following nutritional profile:

Serving size:  One wrap

Calories:  242
Fat:  17 grams
Carbs:  16 grams
Sugars:  5 grams  
Protein:  7 grams
Fiber:  14 grams  
Sodium:  202 mg 


For dessert I had three slices of watermelon.  Mmmmm--a perfect lunch!  

Wednesday, July 28, 2010

Hoppin' John Salad for Lunch

     Hoppin' John is a beans and rice dish from the south that is traditionally made on New Year's Day for good luck.  I don't know about you, but I need good luck all throughout the year, so I have no problem making this salad right smack in the middle of summer.  The best thing about it is that you can make it one day (or night) and have a healthy, convenient lunch ready for the next 3-4 days.  The original Hoppin' John dish is made with bacon and who knows what else--I'm not from the south--but this salad version is much healthier.

   I originally encountered this recipe when my mom was diagnosed with cancer in 2007 and I started my nutrition mission.  Cancerproject.org is home to a group that promotes a plant-based diet for cancer survival  and they have a free cook book that I downloaded, The Survivor's Handbook:  Eating Right for Cancer Survival.  Even for someone without cancer, this is a great resource for transitioning to a plant-based diet and has a ton of great recipes!  They have a Hoppin' John Salad recipe that was the inspiration for my salad.  I made a few changes to make it more colorful and crunchy, but you should check out the book because the original recipe is great, too.

Hoppin' John Salad
Adapted from The Survivor's Handbook:  Eating Right for Cancer Survival


For the salad: 
1 (15.5 ounce) can black-eyed peas, drained and rinsed
1 cup cooked brown rice
1/2 cup finely sliced green onions
1 celery stalk, finely sliced
1 large carrot, cut in half length-wise and thinly sliced

For the vinaigrette:
1/4 cup rice vinegar
1 tablespoon olive oil
1/4 teaspoon salt

In a small bowl, whisk together the rice vinegar, olive oil, and salt.  Set aside.  In another bowl, mix together the salad ingredients.  Drizzle the vinaigrette over the salad and mix gently.  If you have time, refrigerate for a few hours.  If you need it now, eat it right away!  Serve alone or over a bed of spinach or your favorite lettuce/greens.

Yield:  4 large servings (main course) or 8 small servings (side dish)


Sunday, July 25, 2010

Red beans and rice did miss her!

    When I told Tim we were having 'beans and rice' for dinner, he busted out with some Baby Got Back lyrics, so I couldn't resist using them as my title.  Black beans and rice would be more accurate, however.  This is a recipe adapted from Vegan Yum Yum, which is a fantastic vegan cook book.  Not one recipe has yet to let me down from this book.
   The best part about this dinner is that it has kale--and I still like it.  There seem to be an abundant number of vegan and vegetarian bloggers out there who claim to love kale.  I wish I could say I fell in this camp but then I would just be a poser.  Kale, in my very humble opinion, does not taste good.  At all.  Unless it's in the form of kale chips, I'm never too impressed with this particular leafy green.  That being said, I know I should try to sneak it into my diet every now and then since it has super nutritional properties and those super green veggies are the ones we should be striving to get the most of in our diets.
    And here is where Tahini Lemon Rice and Beans comes in to save me from my kale-hating ways.  Now, I had to adjust this recipe some because in addition to the kale, black beans, and brown rice it calls for, it also includes seitan.  I have only had one seitan experience.  I tried to make it homemade using the recipe from Veganomicon , and the results were not pretty.  I can usually choke down my cooking disasters even when I know it isn't the most delicious thing I've ever tasted, but this--this was completely inedible.  So right off the bat seitan was eliminated from the ingredient list.  I can't say what it would be like with the seitan, but without it, it was delicious.  So good that as I am writing this I wish I had a plate in front of me even though I just had lunch.  The kale blends right in with the dish and I couldn't taste any of its normal bitterness. The sauce is incredibly rich and creamy.  I'm pretty sure I'll be making this dish again very soon as I am salivating just from writing this description.
   Let me warn you before I get to the recipe:  it isn't a pretty meal.  Tim suggested I not photograph this one.  I went ahead and took the picture because I know I like seeing what something is supposed to look like before I make it.  Cook books with color photos are my favorite.  :)

Tahini Lemon Rice and Beans
Adapted from Vegan Yum Yum 


1 cup brown rice
Tahini Lemon Sauce (recipe below)
Coconut oil for sauteing
1/2 bunch kale, deveined and chopped
1 1/2 cups cooked black beans, or one 15.5 ounce can, rinsed and drained

Tahini Lemon Sauce
1/4 cup low-sodium Tamari or soy sauce
1/4 cup tahini
Juice from 1 large lemon (about 2 tablespoons)
2 tablespoons rice vinegar
2 tablespoons Worcestershire sauce (I use regular rather than vegan varieties since I'm not a vegan and don't necessarily need my meals to be completely animal-free)
2 tablespoons water
2 tablespoons olive oil


Step 1:  Start cooking the rice according to the package directions or however you normally cook your rice.

Step 2:  Make your sauce.  Simply whisk all the ingredients together (see my lovely ingredients picture above?)  in a bowl and set aside.

Once your rice is getting close to being done, start the next step.

Step 3:  Heat a small amount of oil in a saute pan and add the kale.  Once the kale starts to wilt, add the beans and heat through.

So happy all this kale was part of the meal!!  

Step 4:  Stir in the sauce and turn off the heat.   Cover until the rice is finished.  Once the rice is finished cooking, add it to the pan and toss to coat.  

                                         
I told you it wasn't pretty, but remember it is oh so good!

Meghan took one look at this dish and said, "Oooh! Oooh!", which, by the way, is her way of saying, "Noooo!  Noooo!" because she doesn't pronounce her n's yet.  This was frustrating because I know this is one meal she would like if she would just taste it!  She hasn't yet learned the value of not judging a meal by its looks and I don't think she's quite old enough for me to apply the "you must at least taste everything" rule.  She did eat some black beans once they were removed from the other offending ingredients and made to look completely plain.  Secretly, I think Tim and I weren't too upset that she didn't eat any because that meant there was more for us. 

Thursday, July 22, 2010

Another Quinoa Side Dish

      I've been on a bit of a quinoa kick lately.  You can't get too much of a good thing, right?  Quinoa is a versatile and delicious whole grain; I especially love it because it's a great protein source.  That's the first question people ask when they learn I limit my animal products:  But where do you get your protein?  As if animal foods are the only foods on the planet to provide protein.  Trust me, if you eat a variety of whole grains, nuts, seeds, beans, and legumes, you will probably easily get more protein than you need. But I digress.  Here's  a simple little quinoa side dish that can compliment a variety of meals.  Think of the meals you'd usually have a rice side dish and swap in this one.  It's tasty, filling, and relatively easy to make.

Quinoa Chickpea Pilaf
adapted from Veganomicon


2 tablespoons coconut oil
1 small yellow onion, chopped finely
2 cloves garlic, minced
1/2 teaspoon ground cumin
1 1/2 teaspoons  ground coriander
freshly ground black pepper, to taste
1/2 teaspoon salt
1 tablespoon tomato paste
1 cup quinoa
2 cups cooked or 1 (15 ounce) can chickpeas, drained and rinsed
2 cups vegetable broth

Step 1:  In a small stockpot over medium heat, let the coconut oil melt.  Add the onions and saute for about 7 minutes.  Add the garlic and saute for 2 more minutes.

Step 2:  Add the tomato paste, coriander, cumin, black pepper, and salt and saute for another minute.

Step 3:  Add the quinoa to the pot and saute for 2 minutes.

Step 4:  Add the chickpeas and broth; cover and bring to a boil.  Once it is boiling, lower the heat to low, cover, and cook for about 18 minutes, stirring occasionally, or until the quinoa has absorbed all the water.  Fluff with a fork and serve.

There was plenty left over so I could have it for lunch today.  Paired with a small salad of arugula+one small sliced carrot+sliced celery+a few slices avocado+sesame seeds+sliced almonds+drizzle of balsamic vinaigrette dressing and it was an immensely satisfying lunch.

Tuesday, July 20, 2010

Toddler Tuesday: Thank Goodness for Smoothies

    If there is one thing I've learned about toddlers, it's that you always have to be on your toes.  Once you get comfortable and think you have things figured out, everything changes.  Meghan goes through stages where she eats a lot and then stages where she hardly eats at all.  Despite how much she is eating, I have always been able to count on her eating some sort of vegetable and fruit throughout any given day.  It may not always be as much as I would like, but I stay relaxed as long as she gets some of the good stuff in her.  She really tested my ability to stay relaxed about her eating, however,  during the end of last week.  Suddenly, without warning, Meghan started refusing just about anything plant-based.  She didn't want fruit, vegetables, or beans.  The second day after this started, this is what she ate:

breakfast:  plain yogurt (I tried to sprinkle it with a little granola and blueberries and she was NOT happy)
lunch:  cheese
dinner: butter

   I'm not kidding.  There is no exaggeration here.  For dinner, all she wanted was the butter.   She had a plate of delicious food in front of her, but she just pointed to the butter that was on the table and would not relent until that's what she got.  I tried to put it on bread for her.  Oh, no, Mommy, that is not what I meant.  I just want to stick clumps of butter in my mouth plain.  GROSS!  I will admit, at this point, I was starting to stress out.  What if this becomes a constant trend and all she wants is dairy products?
    There is one thing that she usually will not refuse: smoothies.  The next day after her all-dairy day I turned to the smoothie to help rectify the no fruit or veggie situation.  The great thing about smoothies is that you can make it super healthy and it still seems like a treat.  They are great for breakfast and Meghan also regularly eats them for snack.  They are especially nice if you need breakfast on-the-go.  When we need to get somewhere early in the morning, I make a smoothie the night before, put it in her straw sippy cup and refrigerate it, and then in the morning she gets her breakfast in the car.
    For Meghan's smoothies, I start with plain yogurt (the flavored kind has way too much sugar!), milk, and then add whatever fresh ingredients I have on hand.  Here are a few recipes if you need help getting started:


                                    ^^^Notice Meghan's empty cup in the background. :)


Mom's Emergency Super Smoothie
For when your little one isn't eating her fruits or veggies!


1/4 cup plain yogurt
1/4 milk
1 small handful fresh blueberries
3-4 strawberries
1/4 cup cubed cantaloupe
1 small handful fresh baby spinach
1 Tablespoon ground flaxseed meal
1 Tablespoon honey (preferably raw)
3-5 ice cubes

Place all ingredients in blender (I use my Magic Bullet) and blend until smooth.
This makes enough for 1 large or 2 small smoothies.  I usually fill Meghan's cup and then drink whatever is leftover.
Tip:  When using spinach in a smoothie, it's best to not put the spinach in first.  


Meghan's Favorite Smoothie 
This is Oh. So. Good.  

1/4 cup plain yogurt
        1/4-1/2 cup milk (depending on how thick you like it)
1 banana
2 heaping Tablespoons peanut butter
1 Tablespoon ground flaxseed meal 

Place all ingredients in a blender and blend until smooth.  Makes 1 large or 2 small smoothies.  Meghan likes to hog this one--she loves it!

     I am happy to report that Meghan seems to be getting back on track this week with her eating.  Today for lunch I pulled out an avocado that I knew was going to go bad if we didn't eat it up soon.  Eating avocados before they go bad is never a problem in this house, but with Meghan's fruit and veggie strike there are a few they are on the brink.  I was nervous as I cut it into chunks and served it to her, but knew my girl was back when she exclaimed, "Mmmmmm, 'cado!"  Here she is gobbling it up:


   I know the last closed-eye picture isn't great, but I wanted to show the empty tray.  She ended up eating an entire half of the avocado, and I was a happy mama.  I'm glad that I have learned that refusing a food one day doesn't mean she is never going to like it.  There are many vegetables that she refused multiple times before deciding she likes them (cauliflower and asparagus included) and it isn't uncommon for her to change her mind multiple times about liking a certain food.  The best thing you can do is continue to offer a variety of healthy foods--eventually your little one will eat (and enjoy!) the good stuff.  In the mean time, sneak it in a smoothie!  

Wednesday, July 14, 2010

Roasted Yellow Pepper and Corn Bisque with Corn and Edamame-Sesame Salad

   I know what you're thinking.  Soup?  In the summer?  Yes!  I was super excited to see fresh sweet corn from the local farm make its way into my beloved Dorothy Lane Market this week.  Fresh corn on the cob in the summer time conjures up memories of carefree summers on the lake and I can be brought back by eating it, even if I'm not in Northern Michigan and nowhere near a lake.  Despite my love of corn on the cob, I thought it would be interesting to find some different ways to use the fresh corn.  (We'll still be eating plenty of it on the cob, make no mistake about that.)  My search brought me to these two recipes, both from  Veganomicon.  Yep, this is a completely vegan meal.  A vegan meal that got no complaints from my meat-eating husband. (Those are hard to come by) Let me tell you, the salad was good.  Definitely worth trying.  But the soup?  The soup was to. die. for.  I love, love, LOVED this soup.  So did Tim.  Meghan thought it was just okay, but for her I think it was more of a frustration-with-trying-to-get-this-runny-soup-into-my-mouth issue.  She's only 21 months and hasn't completely mastered the art of eating soupy things.  Please try this soup.  You will be happy you did.

Roasted Yellow Pepper and Corn Bisque 
adapted from Veganomicon


4 yellow bell peppers
3 cups fresh corn, cut from the cobs (from 3-4 cobs, depending on the size)
1 tablespoon coconut oil
1 medium-size Vidalia onion, diced
3 cloves garlic
2 hot red chiles, seeded and sliced thinly
1 yellow summer squash, cut in half lengthwise and sliced thinly (about 3 cups)
3-4 cups vegetable broth (I used 4)
1 1/2 teaspoons salt
1 (14 ounce) can coconut milk (lite is fine; I used regular.  I also had a 13.5 ounce can instead of 14)
1 tablespoon pure maple syrup
Juice of one lime
good pinch nutmeg

Step 1:  Roast the peppers.  I did this during Meghan's nap time to cut down on the dinner-time crunch.  It can be done up to a day ahead.  Here's how you do it:
Pre-heat the oven to 375 degrees.  Cut the stems off and pull out the seeds.  Place them on a rimmed baking sheet, covered with parchment paper if you prefer. (Makes for easier clean up)  Bake for 40 minutes, turning them once.  The peppers should be very soft and collapsed*.  Carefully place them in a plastic bag and let them sit for about 30 minutes.  This will allow them to steam and make peeling away the skin easy.  Remove them from the bag, peel, and roughly chop.  If you aren't making the rest of the recipe now, put them in an air-tight container and refrigerate until ready to use.  
*I didn't let mine roast long enough AND I forgot to turn them during the cooking time.  I've roasted peppers before and it's never been difficult to remove the skins, but this time it was.  Make sure they are ready and you remember to turn them!  Here are my before and after pics, but remember, they weren't actually ready. :-)


And here they are in the bag:


Step 2:  Preheat a soup pot over medium-high heat.  Add the coconut oil and allow it to melt.  (Or if you are using olive oil, as I'm sure some of you are, let it heat a bit)  Saute the onion until it is soft and translucent, about 5-7 minutes.  Add your garlic and chiles and saute about another minute.  Then add your corn and squash.  Keep sauteing, about 5 more minutes, until you see the moisture coming from the squash.  

                                     
Step 3:  Add the roasted peppers, vegetable broth, and salt.  Cover the pot and bring the mixture to a boil.  Then, lower the heat and simmer, covered, for another 20 minutes.  

Step 4:  Add the coconut milk and puree the soup.  It is handy-dandy if you have an immersion blender.  I do, however, when it was time for this step I discovered the battery needed charging.  Booo!  Instead, I had to transfer to the big blender and puree in batches.  Oh, well.  

Step 5: Allow the soup to heat through again.  Add the lime juice, maple syrup, and nutmeg, stir, and it's ready to serve!  
Here's the lame picture that doesn't do it justice.  I need to work on my photography skills.  A bowl that doesn't match the color of the soup would have helped, too.  


Corn and Edamame-Sesame Salad
adapted from Veganomicon

2 tablespoons sesame oil
1 tablespoon rice vinegar
2 teaspoon low-sodium tamari or soy sauce
2 cups frozen, shelled edamame
1 cup fresh corn, cut from the cob
2 tablespoons toasted sesame seeds 

   Bring a pot of water to a boil.  While you are waiting for the water to boil, whisk together the sesame oil, rice vinegar, and tamari in a medium bowl and set aside. 
    Boil the edamame for 3 minutes, then add the corn and boil for another 2 minutes.  Drain into a colander and run under cold water.  When it is cool enough to touch, add the edamame and corn to the dressing and toss to combine.  Add the toasted sesame seeds and toss again.  (To toast sesame seeds, place in a small pan over medium heat.  Gently toss in the pan until they turn golden brown.  Watch carefully as they can go from white to burnt quickly!)  

At this point, the recipe says to chill for at least 15 minutes.  I did this, but Tim and I both agreed it would be better as a warm side dish.  We tried it this way the next night, and it was better.  Try it both ways and see what you think!  


Here is a picture of Meghan's dinner:

                                
She at all of the avocado, a little of the soup, and none of the salad.  Even though she usually loves edamame, she wouldn't try it.  Not sure if that's because it looks different in this salad form (she usually has it plain) or if she was just not in the mood.  I don't stress about these things too much.  She ate a ton of blueberries for dessert, as usual.  The girl loves her fruit.  
   

Tuesday, July 13, 2010

Toddler Tuesday: Broccoli Bites


   If your toddler or even older child is reluctant to eat her veggies, I encourage you to try these delicious nuggets.  Even though Meghan will eat plain broccoli, she eats much more when it is in this form.  I first started making these for her when she was around 10 months old; I would just cut them into small pieces.   The best thing about these yummy broccoli bites is that they are so versatile.  Your whole family will enjoy them and they are great for both meals or snacks.

Broccoli Bites
Adapted from www.homemadebabyfood.com 


1-10 ounce package organic frozen broccoli (fresh steamed broccoli may work, I have just not tried it)
1/2 cup whole grain bread crumbs*
2 whole organic eggs (if your little one is not eating egg whites yet, use 3 yolks)
1 cup shredded organic mild cheddar cheese
1/4 teaspoon garlic powder
1/2 teaspoon dried oregano
1 teaspoon dried basil
1 teaspoon kelp (optional)
1 tablespoon ground flax seed meal (optional)

Step 1:
Preheat oven to 375 degrees.  Coat a baking sheet with olive oil or spray with non-stick cooking spray and set aside.

Step 2:
Cook broccoli according to package directions and chop into small pieces.

Step 3:
In a medium bowl, whisk eggs.

Step 4:
Add remaining ingredients to bowl and mix until well incorporated.  (You may have to use your hands)

Step 5:
Shape the mixture into 1 1/2 inch nuggets and place on the baking sheet.  Cook for 20-25 minutes, flipping the nuggets over half way through the cooking time.

Serve warm.

Wednesday, June 30, 2010

Carefree lunches

   As I mentioned yesterday, we just got back from a two-week vacation.  We are barely going to get unpacked before we will be back on the road again as we are heading to Chicago for the weekend.  With such a short time between trips, I'm keeping lunches simple this week.  Meghan started out with a bowl of organic peas with a some butter.  (I used frozen so I just had to heat them up in the microwave for 30 seconds)  She ate the entire bowl--she really likes peas.  Here she is enjoying her first course:
   While she was eating her peas, I prepared her a classic grilled cheese sandwich, with a little sprinkle of kelp.  Kelp, or seaweed, contains nearly 30 minerals so I sprinkle it on certain foods whenever I can.  Just a healthy little add-on to boost the nutrition of a regular old grilled cheese.  Here's my kelp container:


I bought an empty spice container with a sprinkle top and buy the kelp from the bulk section of the health food store.  Here's the sandwich before I put it in the panini press.  (Using the panini press is so much easier than a pan!)  The swiss cheese I used was so holy I needed to use two pieces.  


And here's the grilled cheese:


Meghan only ate half of her sandwich, so I helped her out and finished the second half.  Last, she had three handfuls of organic grapes.  She was eating them faster than I could slice them in half!  
My easy lunch was the leftover quinoa salad from last night. 
 So yummy and very satisfying!


I have a confession to make:  I love Starbucks.  Love it.  I crave their yummy coffee drinks a lot, but try to only get them occasionally.  It's that darn sugar.  Grrr.  Anyway,  I was craving one after putting Meghan down for her nap.  Since my daughter was sleeping and slipping out to Starbucks was not an option, I decide to make my own, somewhat healthier version.  I wanted to make a Frappicino (sp?) style drink of blended coffee, but once I got all of my ingredients in the magic bullet, I didn't have room for 
ice! 
So instead, I just had an iced coffee drink.  I am sipping it now and it is yummy.  Here's what went into it:  1 cup coffee, 1 cup soy milk, 1/2 T. unsweetened cocoa powder, 1 T. agave nectar.  It turned out not too sweet with a subtle chocolate flavor.  And no refined sugar like the kind I would have gotten at Starbucks!  I made more than I needed, so the extra was put into the fridge.  


Well I am off to get the less fun things accomplished during the rest of Meghan's nap.  Tonight I am going to make my first attempt at grilled pizza.  I'll keep you updated on how it turns out.  

Tuesday, June 29, 2010

Hiatus Over

     I took a break from my food blog for various reasons over the past months.  I wasn't sure when I'd get back to it, and then something weird happened to me in the last few weeks.  I've found myself thinking as if I'm blogging.  It's really strange- as I'm eating or preparing a meal, I find myself thinking about what I'd write about it, actually writing the blog in my head.  I guess that was my sign that I ought to get back to the food blogging thing.  So, here I am, ready to jump back in with no particular plan in mind.  I really don't know what format I'll use; I'm not going to make any promises or declarations, but I will say that I feel like I want to do this everyday.  We'll see if that motivation continues or is just a passing fancy.
   We just got back from a two-week vacation last night, so today there was not much food in the house.  We did have some eggs and an unopened package of shredded cheese, so Meghan and I had cheese omelettes, with a little milled flax seed sprinkled in there, for breakfast.  On a side note--why is it that organic eggs last so long?  I buy local organic eggs and the expiration date on them is always like a month or more away.  It seems like in the day when I didn't buy organic or local eggs they didn't last that long.  Weird.  Anyway, Tim left for work before we were up, but I don't think he had anything for breakfast.  Hopefully he didn't stop at McDonald's.  
    There was no hope for lunch, so a trip to the grocery store was in order.  We got back shortly before it was time for Meghan's lunch, so I didn't have much time to prepare her food.   It was a quick and easy lunch day for Meghan.  I started out with about a 1/4 cup of frozen green beans.  Frozen veggies are so quick and easy, they've been a staple in Meghan's diet.  I feel good about serving them to her because in many cases they can have more nutrients than the "fresh" variety in the grocery store since the veggies are frozen so quickly after they are harvested.  Often the "fresh" veggies are traveling such a far way by the time they get to your local store they've lost a significant amount of nutrients.  So, I popped the grean beans in the microwave with a little water for 30 seconds and they were good to go.  Here she is enjoying her first course:
  This picture shows quite accurately how she feels about green beans.  Eh, they're okay.  She ate them, though, so I can't complain.  After this picture, the battery on my camera died. (You know that two-week vacation I mentioned?  We took over 500 pictures.)  So for the rest of the meal you will just have to rely on mental visualization.  After the green beans, I gave her some shelled edamame (again, frozen).  She loves her some soy beans.  I munched on a few of them, as well, because at this point I was getting a little hungry, too.  Next was a slice of bread with Vermont Monkey Business peanut butter.  This peanut butter was something we found at a little store on our vacation.  I thought it sounded so interesting--natural peanut butter with raisins and banana.  It sounds good, right?   Well, it is.  BUT.  This store had a convenient way of not putting price tags on things.  We didn't even think about it; I just assumed the pb would cost $5-6.  Wrong.  It was an $11 bottle of peanut butter!  It's good, but not that good.  Anyway, her last course was some honeydew melon.  I'm not sure what I was thinking buying a silly honeydew.  It's not in season and it really wasn't that great.  Meghan ate it, nonetheless.  She loves, loves, loves fruit.
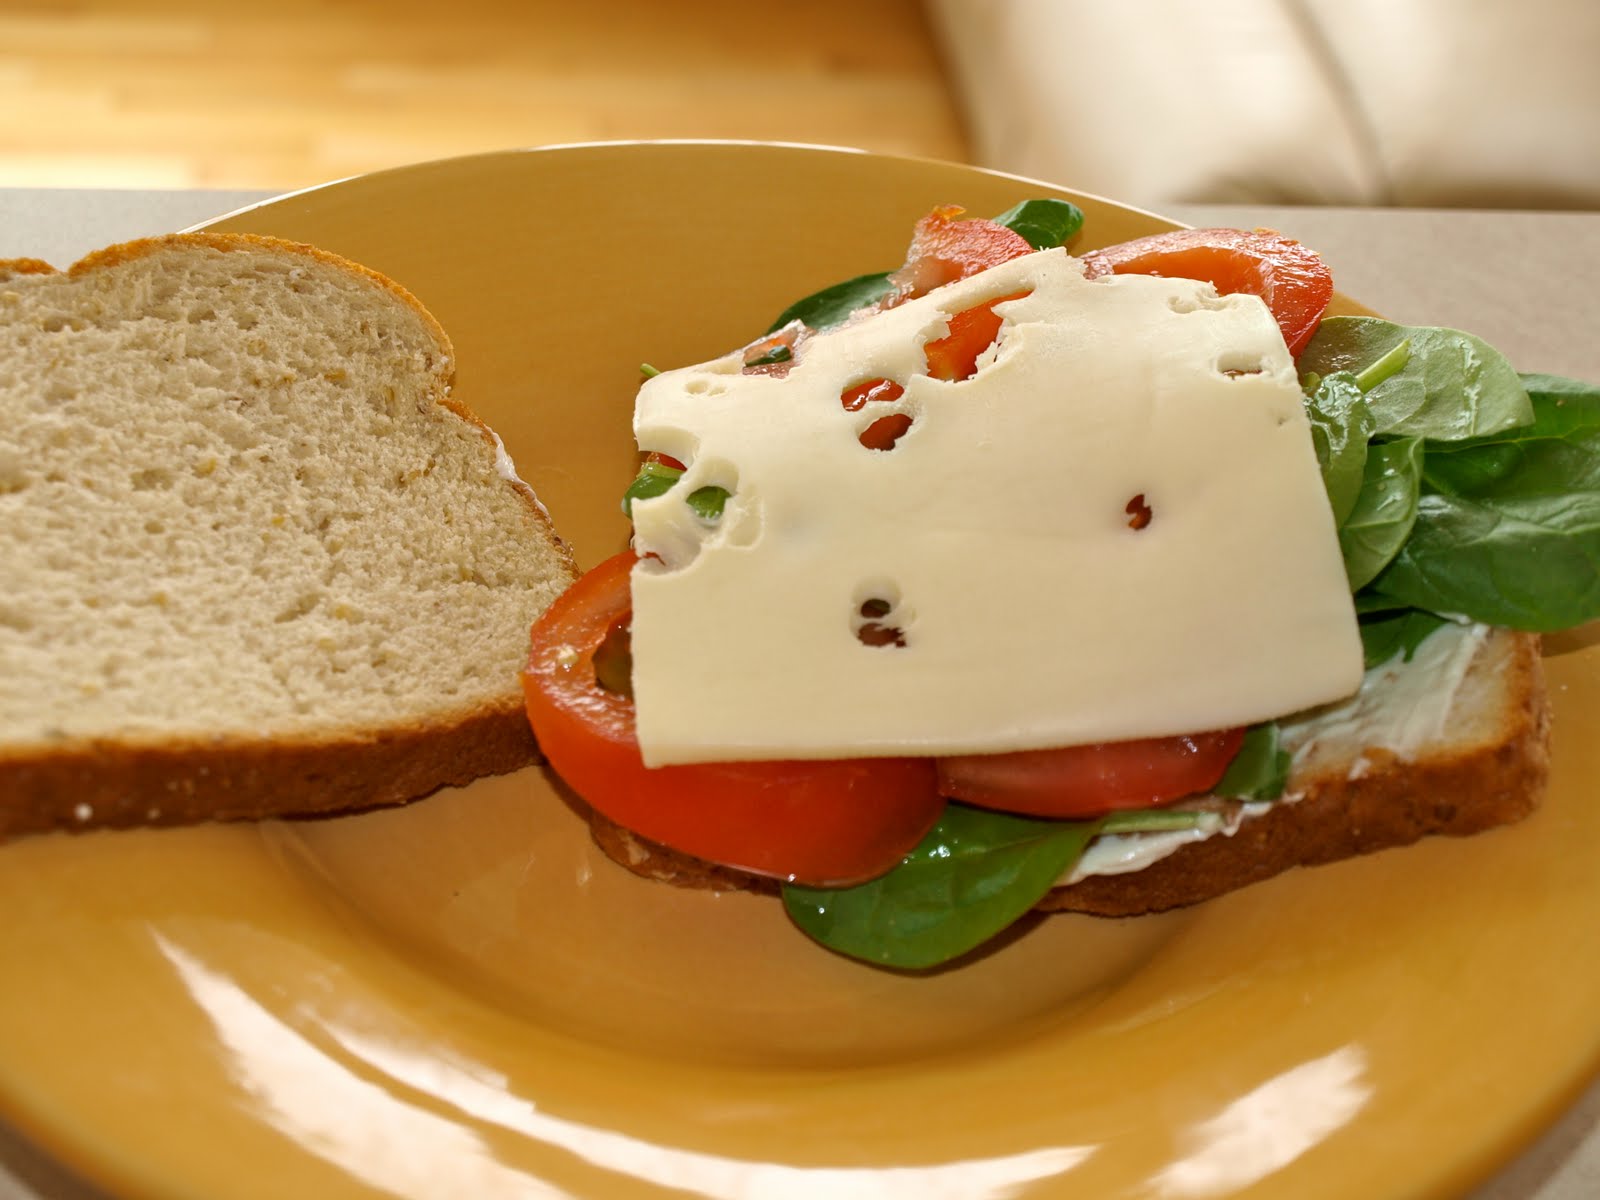
   After Meghan went down for her nap, I could devote a few minutes to my own lunch.  I decided on a Tomato-Spinach sandwich with sliced strawberries for dessert.  Here were my ingredients:
Oat Nut bread, baby spinach, a tomato, baby swiss cheese, and some Veganaise (vegan mayo).

I love warm sandwiches, even in the summer, so decided to use the panini press for this one.  I love my panini press!  Here's the sandwich before the panini press:
And here was the final result:
I couldn't fit the whole tomato on the sandwich, so I had the extra slices on the side with a tiny bit of sea salt.  Yum! This was a great lunch.
  When Meghan woke from her nap, we shared a lovely smoothie for a snack.  The ingredients were:  5 strawberries, a handful of honeydew chunks, three heaping tablespoons of plain, organic yogurt, and a tablespoon of raw honey.  It was delicious and Meghan hogged most of it.  Here is Meghan enjoying her smoothie:


    For dinner I bought a few thinly sliced, skinless, boneless, chicken breasts and a bunch of asparagus for the grill.  Don't you just love grilling season?  It's so easy and grilled food tastes soooooo good.  For the chicken I did  a simple marinade of olive oil, apple cider vinegar, cayenne pepper, and dried thyme (I didn't measure; just put in what seemed like a good amount).  I marinated it for about 2 hours before grilling.  The asparagus was the usual:  drizzled with olive oil, sea salt, and freshly ground black pepper.  Here's the chicken and asparagus on the grill:
  For another side dish, I prepared an Italian Quinoa Salad.  This turned out really tasty, so I'll share my on-the-fly recipe:

Italian Quinoa Salad

1 cup quinoa
2 cups vegetable broth
1 1/2 cups cooked or 1- 15 oz can (drained and well-rinsed) Great Northern beans
1/3 cup sun-dried tomatoes (oil-packed), chopped
2 T. pine nuts, toasted
1 large handful fresh basil, coarsely chopped
1/4 cup olive oil
2 T. red wine vinegar
1 tsp. dijon mustard

Bring the vegetable broth to a boil over high heat.  Add quinoa, turn heat to low, cover, and simmer for 20 minutes.  Remove from heat and leave cover on for 10 more minutes.
In a large bowl, carefully combine quinoa, beans, tomatoes, basil, and pine nuts.  Set aside.  In a small bowl, combine olive oil, vinegar, and mustard.  Drizzle oil mixture over the quinoa and mix until evenly coated.  Serve warm.
Yield:  6-8 servings.
Here's the complete dinner:
     As you can clearly see and read, I am not eating vegan (or even vegetarian) lately.  I am somewhat nutritionally confused.  I've been reading nutrition books with conflicting messages and trying to figure out where I stand. Right now my view is "everything in moderation".  My nutrition journey is continuing to evolve and I know I will figure out the healthiest path, eventually.
   Okay, so I don't think I'll be writing this much everyday.  I guess I was feeling overly ambitious after my long hiatus.  More realistically, I may write about one meal everyday.  We will see.

Tuesday, March 30, 2010

Toddler Tuesday: Spinach Nuggets with a Fun Yogurt Dipping Sauce

    I was rereading part of Super Baby Food by Ruth Yaron and she lists the "Super Green Veggies" as kale, broccoli, greens, brussels sprouts, asparagus, swiss chard, okra, peas, and spinach.  She suggests that babies and toddlers (and the rest of us, too, I suppose) should have at least one serving of vegetables from this group everyday.  I have to be honest and say that Meghan only eats three of those vegetables on a somewhat regular basis (broccoli, asparagus, and peas) and she definitely doesn't get at least one serving a day.  I was inspired to try to accomplish this feat, however, and decided to try to create a kid-friendly recipe that included spinach.  I include spinach in my own cooking all the time, but Meghan doesn't usually want any part of the leaves.  This recipe for spinach nuggets was a success.  The nuggets were crispy and tasty.  These are perfect for a toddler, but would also be great for a healthy snack for older kids.  I was able to do all the prep and get them into the oven while Meghan watched Sesame Street.  They cooked in the oven and were ready by the lunch time.  While they were cooking I decided a fun dipping sauce would be appropriate, especially since Meghan seems to love dipping her foods lately.  With just a few simple ingredients, making the sauce is quite easy, and Meghan enjoyed "helping" me.  You can make the dipping sauce, or just use ketchup. :-)

Spinach Nuggets


1/4 cup sliced almonds*
2 large handfuls fresh baby spinach
1 1/2 cups whole wheat breadcrumbs, divided
2 eggs
1/4 cup flaxseed meal**
1 teaspoon basil
1 teaspoon oregano
1/4 cup shredded cheese (I used cheddar, but any kind will be fine)

*If you haven't introduced nuts to your toddler yet, try to substitute extra bread crumbs.  I started introducing nuts at age 1 with Meghan and haven't had any issues.
**If you don't have flaxseed meal on hand, you can use extra breadcrumbs here as well.  Flaxseeds are nutritional powerhouses, though, so I highly recommend you keep flaxseed meal on hand.  It's easy to sprinkle in to most any recipe or snack.  I currently use Bob's Red Mill brand.
Step 1
Preheat the oven to 350 degrees.  Spray a cookie sheet with non-stick cooking spray and set aside.
Place the almonds in the food processor and process until they turn into a fine crumb.
Step 2
Add the two handfuls of spinach and pulse until you have a green crumb-like mixture. Set aside.
 Step 3
Whisk the two eggs in a small bowl.                                                                                        


Step 4
Add the spinach-almond mixture, 1/2 cup of breadcrumbs, the flaxseed, basil, oregano, and cheese and mix until evenly incorporated.
Step 5
Place the remaining cup of breadcrumbs in a small bowl.  Using your hands, form a small portion of the spinach mixture into a ball and roll it in the breadcrumbs until it is fully covered.
Put it on the cookie sheet and press it down to form a nugget shape.  Repeat with remaining spinach mixture and breadcrumbs.  You should end up with 15-20 small nuggets.
Step 6
Bake for 25 minutes, turning the nuggets over halfway through the cooking time.  Allow to cool and serve.
Yogurt-Thyme Dipping Sauce


1/4 cup yogurt*
1/8 cup tahini (sesame paste)
juice from 1/2 lemon
1/2 avocado
1 tsp. dried thyme

Place all ingredients in blender and blend until smooth.

*I used full-fat yogurt as fat is extremely important for the developing brains of babies under 2.  If you have an older child, you may want to use low-fat or non-fat yogurt.
Here is Meghan enjoying her nugget.  Please excuse the crazy-baby hair.  She was in a I-don't-want-to-keep-my-bow-in kind of mood.  She ended up enjoying the dip a little too much and eating the rest of it with her hands. I didn't mind since the ingredients were healthy.
Later in the meal when she was having her peanut butter banana "sandwiches" (cut a banana length-wise, spread with peanut butter, put it back together, and slice), she decided to dip those as well.  Gross, but whatevs.  
Since there was a nice, big batch of nuggets, I froze them.  I put two nuggets each into small plastic bags, and then put those inside a ziplock freezer bag.  These will be simple to pull out and pop in the microwave for a quick veggie side or snack.