Showing posts with label dinner. Show all posts

Thursday, July 29, 2010

Vegetarian BBQ Loaf with Baked Beans

   We are getting ready to go out of town for a week, so this was my let's-try-to-use-up-all-of-the-food-in-the-house meal.  When I looked in the fridge and saw we had carrots and celery for vegetables (and not much else) I immediately thought of making a veggie "meatloaf".  Then I realized that's sort of a winterish dish, so I thought I'd put a summer spin on it by using BBQ sauce and accompanying it with baked beans.  It's hard to find a good BBQ sauce that doesn't have high fructose corn syrup.  Most have that ugly ingredient number one on the list.  It's worth it to take the time to find a good one that doesn't have HFCS and isn't too high in sugar.  (Finding one without sugar is nearly impossible--let me know if you know of a brand that makes doesn't have it!)
   I've made a lot of variations of veggie loaves/patties/balls and I love that you can vary your ingredients based your mood or what you've got on hand.  This version turned out really well and I'll definitely make it again.
Gather your ingredients:


Vegetarian BBQ Loaf

3 carrots
2 celery stalks
1/2 onion (I used 1/2 'cause Tim isn't a big fan of onions--feel free to use the whole thing)
1 cup walnuts
2 eggs
1/3 cup BBQ sauce + more for topping
2 tablespoons reduced-sodium tamari (or regular soy sauce)
1 teaspoons stone ground mustard
1/2 cup shredded cheddar cheese
1 1/2 cups whole grain bread crumbs (not pictured) 

Step 1:  Preheat the oven to 350 degrees.  Oil spray a loaf pan and set aside.  

Step 2:  Peel your carrots and cut them into large chunks.  Cut your celery and onion into large chunks.  Put them in your food processor and process until they are chopped.  Add the walnuts and process until you have a mushy-textured mixture. Set aside.

Step 3:  In a medium bowl, beat the eggs.  Add the BBQ sauce, tamari, and mustard and stir to combine.  Add the cheese and breadcrumbs and knead the mixture with your hands until it is well mixed and holds together.    

Step 4: Transfer mixture to loaf pan and press it down.  Spread the top with BBQ sauce.  Bake for 45 minutes.  Allow to stand for 15 minutes before serving (this gives the loaf a chance to set).  Slice and serve.  

Yield:  8 servings 

                                 
I'm not sure how I could make this loaf look pretty, but trust me, it tasted good.  Tim gobbled up 3 helpings and Meghan, who is being Miss Picky these last few days, ate some as well. 

The baked beans were from 1,000 Vegan Recipes and were delicious, too.  They were sweetened with maple syrup and extremely tasty.  I'd call this clean-out-your-pantry dinner a big success.  

Sunday, July 25, 2010

Red beans and rice did miss her!

    When I told Tim we were having 'beans and rice' for dinner, he busted out with some Baby Got Back lyrics, so I couldn't resist using them as my title.  Black beans and rice would be more accurate, however.  This is a recipe adapted from Vegan Yum Yum, which is a fantastic vegan cook book.  Not one recipe has yet to let me down from this book.
   The best part about this dinner is that it has kale--and I still like it.  There seem to be an abundant number of vegan and vegetarian bloggers out there who claim to love kale.  I wish I could say I fell in this camp but then I would just be a poser.  Kale, in my very humble opinion, does not taste good.  At all.  Unless it's in the form of kale chips, I'm never too impressed with this particular leafy green.  That being said, I know I should try to sneak it into my diet every now and then since it has super nutritional properties and those super green veggies are the ones we should be striving to get the most of in our diets.
    And here is where Tahini Lemon Rice and Beans comes in to save me from my kale-hating ways.  Now, I had to adjust this recipe some because in addition to the kale, black beans, and brown rice it calls for, it also includes seitan.  I have only had one seitan experience.  I tried to make it homemade using the recipe from Veganomicon , and the results were not pretty.  I can usually choke down my cooking disasters even when I know it isn't the most delicious thing I've ever tasted, but this--this was completely inedible.  So right off the bat seitan was eliminated from the ingredient list.  I can't say what it would be like with the seitan, but without it, it was delicious.  So good that as I am writing this I wish I had a plate in front of me even though I just had lunch.  The kale blends right in with the dish and I couldn't taste any of its normal bitterness. The sauce is incredibly rich and creamy.  I'm pretty sure I'll be making this dish again very soon as I am salivating just from writing this description.
   Let me warn you before I get to the recipe:  it isn't a pretty meal.  Tim suggested I not photograph this one.  I went ahead and took the picture because I know I like seeing what something is supposed to look like before I make it.  Cook books with color photos are my favorite.  :)

Tahini Lemon Rice and Beans
Adapted from Vegan Yum Yum 


1 cup brown rice
Tahini Lemon Sauce (recipe below)
Coconut oil for sauteing
1/2 bunch kale, deveined and chopped
1 1/2 cups cooked black beans, or one 15.5 ounce can, rinsed and drained

Tahini Lemon Sauce
1/4 cup low-sodium Tamari or soy sauce
1/4 cup tahini
Juice from 1 large lemon (about 2 tablespoons)
2 tablespoons rice vinegar
2 tablespoons Worcestershire sauce (I use regular rather than vegan varieties since I'm not a vegan and don't necessarily need my meals to be completely animal-free)
2 tablespoons water
2 tablespoons olive oil


Step 1:  Start cooking the rice according to the package directions or however you normally cook your rice.

Step 2:  Make your sauce.  Simply whisk all the ingredients together (see my lovely ingredients picture above?)  in a bowl and set aside.

Once your rice is getting close to being done, start the next step.

Step 3:  Heat a small amount of oil in a saute pan and add the kale.  Once the kale starts to wilt, add the beans and heat through.

So happy all this kale was part of the meal!!  

Step 4:  Stir in the sauce and turn off the heat.   Cover until the rice is finished.  Once the rice is finished cooking, add it to the pan and toss to coat.  

                                         
I told you it wasn't pretty, but remember it is oh so good!

Meghan took one look at this dish and said, "Oooh! Oooh!", which, by the way, is her way of saying, "Noooo!  Noooo!" because she doesn't pronounce her n's yet.  This was frustrating because I know this is one meal she would like if she would just taste it!  She hasn't yet learned the value of not judging a meal by its looks and I don't think she's quite old enough for me to apply the "you must at least taste everything" rule.  She did eat some black beans once they were removed from the other offending ingredients and made to look completely plain.  Secretly, I think Tim and I weren't too upset that she didn't eat any because that meant there was more for us. 

Thursday, July 22, 2010

Another Quinoa Side Dish

      I've been on a bit of a quinoa kick lately.  You can't get too much of a good thing, right?  Quinoa is a versatile and delicious whole grain; I especially love it because it's a great protein source.  That's the first question people ask when they learn I limit my animal products:  But where do you get your protein?  As if animal foods are the only foods on the planet to provide protein.  Trust me, if you eat a variety of whole grains, nuts, seeds, beans, and legumes, you will probably easily get more protein than you need. But I digress.  Here's  a simple little quinoa side dish that can compliment a variety of meals.  Think of the meals you'd usually have a rice side dish and swap in this one.  It's tasty, filling, and relatively easy to make.

Quinoa Chickpea Pilaf
adapted from Veganomicon


2 tablespoons coconut oil
1 small yellow onion, chopped finely
2 cloves garlic, minced
1/2 teaspoon ground cumin
1 1/2 teaspoons  ground coriander
freshly ground black pepper, to taste
1/2 teaspoon salt
1 tablespoon tomato paste
1 cup quinoa
2 cups cooked or 1 (15 ounce) can chickpeas, drained and rinsed
2 cups vegetable broth

Step 1:  In a small stockpot over medium heat, let the coconut oil melt.  Add the onions and saute for about 7 minutes.  Add the garlic and saute for 2 more minutes.

Step 2:  Add the tomato paste, coriander, cumin, black pepper, and salt and saute for another minute.

Step 3:  Add the quinoa to the pot and saute for 2 minutes.

Step 4:  Add the chickpeas and broth; cover and bring to a boil.  Once it is boiling, lower the heat to low, cover, and cook for about 18 minutes, stirring occasionally, or until the quinoa has absorbed all the water.  Fluff with a fork and serve.

There was plenty left over so I could have it for lunch today.  Paired with a small salad of arugula+one small sliced carrot+sliced celery+a few slices avocado+sesame seeds+sliced almonds+drizzle of balsamic vinaigrette dressing and it was an immensely satisfying lunch.

Tuesday, July 20, 2010

A Healthified Mexican Meal

     I love Mexican food, but don't make it that often because Tim is just not that big of a fan.  He says he just tolerates it, but I think he does secretly enjoy the flavors of good Mexican food.  He likes Chipotle, does that count?
    Unfortunately my favorite Mexican meals are not all that healthy--especially heavy on the cheese.  And what is it about Mexican restaurants?  The portions are gargantuan! So my mission was to create a healthy Mexican meal that kept portion sizes in check.  I've been on a Veganomicon kick lately, so I started there.  I found a tasty-sounding recipe called Mexican Millet.  Many of the ingredients I had on hand.  Good start.
   If you aren't familiar with millet, it is a healthy whole grain that actually looks a lot like quinoa.  You already know that whole grains are good for your heart, but millet is also a good source of important nutrients likes phosphorus and magnesium.  It's always good to mix it up and get a variety of whole grains in your diet--not just the standard whole wheat pasta and brown rice. You can pick it up in the grain section of most supermarkets.  Tangent over.
    After deciding on the Mexican Millet from  Veganomicon, I continued my menu planning.  There's a bean and corn salad that I often make.  The original recipe is from allrecipes.com , but it uses canned corn.  It's a shame to use canned corn when the fresh corn is ripe for the pickin'! So I decided to switch it up a bit and use fresh corn.  Usually we use this recipe as a dip for our tortilla chips, but thought it would make a scrumptious filling for some whole wheat tortillas I had in the pantry.
    The result was a stand-up-and-clap meal.  Okay, maybe it wasn't really worth standing up and cheering, but it was darn good.

Mexican Millet 
adapted from Veganomicon 


2 tablespoons coconut oil
1 clove garlic, minced
1 cup millet
1 small yellow onion, diced finely
1 jalepeno, seeded and minced
2 cups vegetable broth
3 tablespoons tomato paste
1/2 teaspoon salt
1/4 teaspoon ground cumin
2 tablespoons finely chopped cilantro
Freshly squeezed lime juice

Step 1:  Heat the oil and garlic in a medium-size, heavy-bottomed saucepan over medium heat.  Let the garlic start to sizzle, and then add the onion and jalapeno.  Stir-fry until the onion gets soft and starts to turn golden, about 6-8 minutes.

Step 2:  Add the millet, stir, and saute for 4-6 minutes, until the millet turns lightly golden.

Step 3:  Pour in the vegetable broth, tomato paste, salt, and cumin.

Step 4:  Bring the mixture to a boil, stir once, and cover.  Lower the heat to low and cook for 25-30 minutes, until the liquid is absorbed.
 
Step 5:  Once the liquid is absorbed, remove from heat and allow to sit, covered for about 10 minutes.

Step 6:  Sprinkle with the chopped cilantro and fluff the millet with a fork.  Squeeze fresh lime juice over each serving.

Sorry I have no pictures of this process.  I was stressing to get dinner ready and didn't think to stop and take pictures.  I do have a picture of the final plate--see below.

Black Bean and Fresh Corn Salad
adapted from allrecipes.com 


1/4 cup balsamic vinegar
2 tablespoons olive oil
1/2 teaspoon salt
1/2 teaspoon Sucanat (or you can use regular old refined white sugar)
1/2 teaspoon ground black pepper
1/2 teaspoon ground cumin
1/2 teaspoon chili powder
3 tablespoons chopped fresh cilantro
1 1/2 cups cooked black beans, or 1 (15 ounce) can, rinsed and drained
1 1/2 cups fresh corn, cut from the cob (I used 2 cobs.  If you don't have any fresh, go ahead and use canned sweet corn)

Step 1:  Bring a small pot of water to a boil.  ~Meanwhile~In a small bowl, whisk together the first eight ingredients.  Set aside.

Step 2:  Cut the corn from the cob.  (I used my chef's knife to do this--it's really easy)

Step 3:  Once the water is boiling, put the corn in the water and let it boil for about 2-3 minutes.  Drain and rinse with cold water.

Step 4:  In a medium bowl, stir together black beans and corn.  Toss with vinegar and oil dressing.

   This salad is best if you can make it the night before and refrigerate overnight.  If you can't do that, do it at least an hour ahead of time to give the flavors a chance to meld.  Just think, if you do it overnight, dinner will come together in a snap!  This salad is amazingly good and very versatile.  Besides the two uses I described above, it can also be used as a topping for a lettuce salad.  Be happy if you have leftovers.

   Here's the final plate.


The picture doesn't do the tortillas justice.  I used small whole wheat tortillas that I had warmed in the oven and filled them with the corn and bean salad. (I warmed up the salad in the oven as well because I wanted a warm tortilla--I'm sure it would be good cold, too)  That's it!  You could add cheese or whatever, but I don't think it's necessary.  The salad has plenty of flavor and texture.

The millet was spicy.  Now my palette is somewhat weak in the spice area, so some of you might think this dish doesn't bring much heat, but both Tim and I thought it was hot.  In a good way.  I put some on Meghan's plate, not sure if it would be too hot for her or not.  She tried a few bites and when I asked if she liked it she shook her head yes.  There were no complaints about its hotness, so I guess she handled it just fine.  She didn't eat that much of it, though.

Tim thought the meal would be better if the millet was mixed in with the corn and bean salad, so that's what he did.  I tried it for lunch today (gotta love leftovers!) and he was right.  The salad has a sweetness about it that paired nicely with the spice of the millet.
 I mixed in a little guac with my lunch.  Another great addition.  There are still leftovers in the fridge, so this recipe makes a good amount of food.  If you have a big family, you'll feed 'em all, if not you can have this for dinner a few nights in a row or have your lunches covered for a few days.  :-)

Thursday, July 15, 2010

Blueberries for Dinner!

  
   With a whole bunch of blueberries from the farmer's market, I decided to incorporate them into a dinner this week.  My other criteria was it must be quick and easy.  Typically I try to mix in at least two super-quick dinners each week.  As much as I love to cook, time-consuming dinners every night is just too much.    So here is my quick-and-easy meal with blueberries:  Blueberry Spinach Salad with Grilled Chicken.  Very simple, yet quite delicious.  I love the strong flavor of blue cheese and think it makes this salad, but if you don't like it, swap in goat's cheese or even feta.

Blueberry Spinach Salad with Grilled Chicken


For the chicken
2 skinless, boneless chicken breast halves (preferably free-range, organic)
olive oil
apple cider vinegar
dried thyme
cayenne pepper

For the salad
5 oz.  organic baby spinach
~2-4 oz. blue cheese, crumbled
1 cup fresh blueberries
1/2 cup toasted pecans, chopped

For the dressing
1/4 cup olive oil
1/8 cup balsamic vinegar
2 teaspoons dijon mustard
1 teaspoon honey (preferably raw)
1/4 teaspoon sea salt

Step 1: In a medium shallow bowl, whisk together a few T. olive oil,  a few T. apple cider vinegar, a bunch of shakes of thyme, and a few good pinches cayenne pepper.  Don't worry about measuring, just make sure there is enough liquid to immerse the chicken.  Add the chicken and  mix everything around until it's evenly incorporated.  Cover and refrigerate as long as you have.  (30 minutes, or 8 hours!) I did about 3 hrs. If you don't have time to marinate, just season with salt, pepper, and/or whatever poultry seasoning you have.

Step 2:  Oil the grill and grill the chicken over medium-high heat until thoroughly cooked, about 5 minutes per side.

~Meanwhile~
Step 3:  Whisk together all dressing ingredients in a small bowl and set aside.

Step 4:  In a dry skillet over medium heat, toast the pecans.  Shake 'em around the pan until you start to smell them, about 5 minutes.  Remove from heat and roughly chop.

Step 5:  Remove chicken from grill and cut into 2 inch pieces.  I use poultry scissors for this.

Step 6:  In a large bowl, assemble the salad ingredients:  spinach, cheese, blueberries, pecans, and chicken.  Drizzle with the dressing and carefully toss.  Viola!  Dinner is ready.

Yield:  2 very hungry people or 4 moderately hungry people.  Tim and I ate it all.  We were starving.

Wednesday, July 14, 2010

Roasted Yellow Pepper and Corn Bisque with Corn and Edamame-Sesame Salad

   I know what you're thinking.  Soup?  In the summer?  Yes!  I was super excited to see fresh sweet corn from the local farm make its way into my beloved Dorothy Lane Market this week.  Fresh corn on the cob in the summer time conjures up memories of carefree summers on the lake and I can be brought back by eating it, even if I'm not in Northern Michigan and nowhere near a lake.  Despite my love of corn on the cob, I thought it would be interesting to find some different ways to use the fresh corn.  (We'll still be eating plenty of it on the cob, make no mistake about that.)  My search brought me to these two recipes, both from  Veganomicon.  Yep, this is a completely vegan meal.  A vegan meal that got no complaints from my meat-eating husband. (Those are hard to come by) Let me tell you, the salad was good.  Definitely worth trying.  But the soup?  The soup was to. die. for.  I love, love, LOVED this soup.  So did Tim.  Meghan thought it was just okay, but for her I think it was more of a frustration-with-trying-to-get-this-runny-soup-into-my-mouth issue.  She's only 21 months and hasn't completely mastered the art of eating soupy things.  Please try this soup.  You will be happy you did.

Roasted Yellow Pepper and Corn Bisque 
adapted from Veganomicon


4 yellow bell peppers
3 cups fresh corn, cut from the cobs (from 3-4 cobs, depending on the size)
1 tablespoon coconut oil
1 medium-size Vidalia onion, diced
3 cloves garlic
2 hot red chiles, seeded and sliced thinly
1 yellow summer squash, cut in half lengthwise and sliced thinly (about 3 cups)
3-4 cups vegetable broth (I used 4)
1 1/2 teaspoons salt
1 (14 ounce) can coconut milk (lite is fine; I used regular.  I also had a 13.5 ounce can instead of 14)
1 tablespoon pure maple syrup
Juice of one lime
good pinch nutmeg

Step 1:  Roast the peppers.  I did this during Meghan's nap time to cut down on the dinner-time crunch.  It can be done up to a day ahead.  Here's how you do it:
Pre-heat the oven to 375 degrees.  Cut the stems off and pull out the seeds.  Place them on a rimmed baking sheet, covered with parchment paper if you prefer. (Makes for easier clean up)  Bake for 40 minutes, turning them once.  The peppers should be very soft and collapsed*.  Carefully place them in a plastic bag and let them sit for about 30 minutes.  This will allow them to steam and make peeling away the skin easy.  Remove them from the bag, peel, and roughly chop.  If you aren't making the rest of the recipe now, put them in an air-tight container and refrigerate until ready to use.  
*I didn't let mine roast long enough AND I forgot to turn them during the cooking time.  I've roasted peppers before and it's never been difficult to remove the skins, but this time it was.  Make sure they are ready and you remember to turn them!  Here are my before and after pics, but remember, they weren't actually ready. :-)


And here they are in the bag:


Step 2:  Preheat a soup pot over medium-high heat.  Add the coconut oil and allow it to melt.  (Or if you are using olive oil, as I'm sure some of you are, let it heat a bit)  Saute the onion until it is soft and translucent, about 5-7 minutes.  Add your garlic and chiles and saute about another minute.  Then add your corn and squash.  Keep sauteing, about 5 more minutes, until you see the moisture coming from the squash.  

                                     
Step 3:  Add the roasted peppers, vegetable broth, and salt.  Cover the pot and bring the mixture to a boil.  Then, lower the heat and simmer, covered, for another 20 minutes.  

Step 4:  Add the coconut milk and puree the soup.  It is handy-dandy if you have an immersion blender.  I do, however, when it was time for this step I discovered the battery needed charging.  Booo!  Instead, I had to transfer to the big blender and puree in batches.  Oh, well.  

Step 5: Allow the soup to heat through again.  Add the lime juice, maple syrup, and nutmeg, stir, and it's ready to serve!  
Here's the lame picture that doesn't do it justice.  I need to work on my photography skills.  A bowl that doesn't match the color of the soup would have helped, too.  


Corn and Edamame-Sesame Salad
adapted from Veganomicon

2 tablespoons sesame oil
1 tablespoon rice vinegar
2 teaspoon low-sodium tamari or soy sauce
2 cups frozen, shelled edamame
1 cup fresh corn, cut from the cob
2 tablespoons toasted sesame seeds 

   Bring a pot of water to a boil.  While you are waiting for the water to boil, whisk together the sesame oil, rice vinegar, and tamari in a medium bowl and set aside. 
    Boil the edamame for 3 minutes, then add the corn and boil for another 2 minutes.  Drain into a colander and run under cold water.  When it is cool enough to touch, add the edamame and corn to the dressing and toss to combine.  Add the toasted sesame seeds and toss again.  (To toast sesame seeds, place in a small pan over medium heat.  Gently toss in the pan until they turn golden brown.  Watch carefully as they can go from white to burnt quickly!)  

At this point, the recipe says to chill for at least 15 minutes.  I did this, but Tim and I both agreed it would be better as a warm side dish.  We tried it this way the next night, and it was better.  Try it both ways and see what you think!  


Here is a picture of Meghan's dinner:

                                
She at all of the avocado, a little of the soup, and none of the salad.  Even though she usually loves edamame, she wouldn't try it.  Not sure if that's because it looks different in this salad form (she usually has it plain) or if she was just not in the mood.  I don't stress about these things too much.  She ate a ton of blueberries for dessert, as usual.  The girl loves her fruit.  
   

Tuesday, July 13, 2010

Toddler Tuesday: Broccoli Bites


   If your toddler or even older child is reluctant to eat her veggies, I encourage you to try these delicious nuggets.  Even though Meghan will eat plain broccoli, she eats much more when it is in this form.  I first started making these for her when she was around 10 months old; I would just cut them into small pieces.   The best thing about these yummy broccoli bites is that they are so versatile.  Your whole family will enjoy them and they are great for both meals or snacks.

Broccoli Bites
Adapted from www.homemadebabyfood.com 


1-10 ounce package organic frozen broccoli (fresh steamed broccoli may work, I have just not tried it)
1/2 cup whole grain bread crumbs*
2 whole organic eggs (if your little one is not eating egg whites yet, use 3 yolks)
1 cup shredded organic mild cheddar cheese
1/4 teaspoon garlic powder
1/2 teaspoon dried oregano
1 teaspoon dried basil
1 teaspoon kelp (optional)
1 tablespoon ground flax seed meal (optional)

Step 1:
Preheat oven to 375 degrees.  Coat a baking sheet with olive oil or spray with non-stick cooking spray and set aside.

Step 2:
Cook broccoli according to package directions and chop into small pieces.

Step 3:
In a medium bowl, whisk eggs.

Step 4:
Add remaining ingredients to bowl and mix until well incorporated.  (You may have to use your hands)

Step 5:
Shape the mixture into 1 1/2 inch nuggets and place on the baking sheet.  Cook for 20-25 minutes, flipping the nuggets over half way through the cooking time.

Serve warm.

Thursday, July 8, 2010

Vegetable Croquettes and Quinoa-Watermelon Salad with Citrus-Basil Vinaigrette

    How's that for a mouthful of a title?  Last night's dinner was just a vague idea in my mind that I kind of made up as I was going along.  I started with a basic kid-friendly dish that I wanted to use--a slight variation of a vegetable croquette recipe from Super Foods for Babies and Children and expanded my meal idea from there.  While visiting with my sister-in-law last weekend she told me about a watermelon salad with fresh basil she'd sampled at Whole Foods.  I thought I'd like to try to make something similar so at first that was my plan.  Then I realized we wouldn't have a protein in the meal, so thought I'd try to make the watermelon salad with quinoa and beans. It sounds like a weird combination, but it worked.  I actually had the leftover salad, cold, for lunch today, and liked it even better than I did last night.  The flavors really developed overnight and it was delicious.  It would be a great cold salad to bring on a picnic or to a potluck.
   If I ever have a meal with a lot of busy-work type prep, like chopping vegetables and such, I try to start it early so I don't have to do it all at once.  I started the croquettes while Meghan was napping so all I needed to do at dinner time was bread and saute them.
 
 Vegetable Croquettes
2 potatoes
1 small head broccoli florets
1 vidalia onion, chopped
1 clove garlic, minced
1 T. butter
1/2 cup grated carrot
1 cup shredded mild cheddar cheese
salt and freshly ground pepper
~3/4 cup Whole wheat flour, seasoned with salt and pepper, plus 3 T. wheat germ (optional)
2 eggs, lightly beaten
2 cups breadcrumbs, plus 2 T. ground flaxseed meal (optional)
coconut oil for sauteing

I love the idea of these vegetables being the basis for our main course!

Step 1:  Scrub the potatoes and cook them in a large pot of salted boiling water for 20+ minutes, until tender and ready to mash.  The original recipe calls for the potatoes to be peeled. If you feel compelled to peel your potatoes, go for it, but I see no reason to peel off the nutrients!
~Meanwhile~
Steam the broccoli for approximately 4-5 minutes, until it turns bright green.  (Don't overdo it)  Chop the steamed broccoli into small pieces.   Saute the onion and garlic in the butter for about 2 minutes. Add the carrot and continue for another minute or so.

Step 2:  Drain the potatoes, mash them, and then mix in the cheese.  Add the broccoli and onion-carrot mixture and combine.  Season with salt and pepper to taste.

Step 3:  Form into burgers.  You should have 12.  At this point, my burgers went in the fridge for later and I began making the vinaigrette.  I will continue with the croquette recipe, though, for continuity's sake.
Step 4:  Put your flour mixture, beaten eggs, and breadcrumb mixture in three separate bowls and create an assembly line.  

                                 
Step 5:  Coat each croquette with seasoned flour, dip in the egg, then the bread crumbs, back in the egg, and then a final coating of bread crumbs.  Saute in the coconut oil until golden brown.  

                                 
I knew we wouldn't eat all 12 of the croquettes, so I froze some of them before sauteing.  


Citrus-Basil Vinaigrette

1/4 cup extra-virgin olive oil
3 T. apple cider vinegar 
juice from 1 large orange
1/4 cup coarsely chopped fresh basil 
sea salt and freshly ground black pepper 

In a small bowl, mix together oil, vinegar, and orange juice.  Whisk until oil and vinegar emulsify.  Add basil and salt and pepper to taste.  


Set aside--you will use half for the quinoa salad and half to drizzle over the croquettes.  

Quinoa-Watermelon Salad

1 cup rinsed quinoa
1 3/4 cup water
2 cups cubed watermelon
1 1/2 cups cooked navy beans, or 1 15 oz. can, drained and rinsed
1/2 recipe of Citrus-Basil Vinaigrette dressing (see above)  
sea salt and freshly ground pepper

Bring quinoa and water to a boil. Stir once, and reduce heat to low.  Cover and cook for 20 minutes.  Remove from heat and allow quinoa to steam for an additional 10 minutes (do not remove lid).  Meanwhile, in a medium bowl, mix together watermelon and beans.  When quinoa is ready, allow to cool for a few minutes and then add it to the bowl and stir to combine.  Add 1/2 of the Citrus-Basil Vinaigrette dressing and stir to coat evenly.  Add sea salt and freshly ground black pepper to taste.  May be served warm or cold.  

I started each plate with a bed of romaine dressing, then added the croquettes and drizzled them with the remaining dressing.  I also placed the salad on top of the romaine.  Add extra dressing as desired.  


I loved all the summertime flavors in this meal.  It's a keeper!  


Thursday, July 1, 2010

Margherita Pizza on the Grill

   The grilled pizza last night was almost a complete disaster.  Thinking back, I'm not sure how I was able to salvage it at all.  Luckily, Tim had an errand to run while I was preparing dinner.  He doesn't do well with the craziness that ensued when I was attempting the pizza.
   I've been wanting to try pizza on the grill for a while now, but was inspired to do it this week when I picked up a copy of Food Network Magazine at a gas station on our drive home from vacation.   There was a recipe for pizza on the grill, but I didn't follow it 100%.  Since I had success with the recipe from 1,000 Vegan Recipes for homemade pizza crust before, I decided to use that one as my base. It was a simpler recipe than the one in the magazine anyway.  From there I followed the directions from the magazine, so I guess it was sort of a hybrid of the two that I used.  The recipe in 1,000 Vegan recipes calls for all-purpose flour, but last time I used half all-purpose and half whole wheat.  This time I decided to use all spelt flour.  This may have been my first mistake, but I can't be sure.   Let me just describe to you what happened step-by-step, and maybe some of you can help me figure out what my mistake was.

Here's the recipe I used for the basic pizza dough, adapted from 1,000 Vegan Recipes

Olive oil
1 cup warm water
1 (1/4 ounce) packet active dry yeast (2 1/4 teaspoons)
1 1/4 teaspoons salt
pinch sugar
2 1/2 cups spelt flour

Step 1:
  Lightly oil a bowl.  Set it aside.

Step 2:
In another bowl, combine the water and yeast and stir until the yeast dissolves.

Step 3:
Add the rest of the ingredients and mix until you get a soft dough.  At this point the dough was really sticky.  I knew it wasn't right, but wasn't sure if I measured the flour wrong or if it was because of the spelt or what.  I added a little more flour, carefully, but it didn't make a big difference.  I was worried, but still hoping for the best.   I decided to proceed.

Step 4:
Flour your hands and transfer the dough to the oiled bowl.  Turn the dough to coat with oil.  Cover with plastic wrap or a kitchen towel and let it rise until it doubles in bulk, about an hour.

Here is my dough after about an hour.  It was doubled in size, but I was very concerned about its sticky appearance.

Step 5:   Flatten the dough a little, and recover it.  Allow it to relax for 10 minutes.
After I let the dough relax, it still looked too sticky.  My fears were confirmed when I tried to remove it from the bowl to my floured work surface.  Check out what was left in the bowl and you can see just how sticky it was:

Step 6:  Transfer the dough to a floured surface.  (Make sure your hands are floured, especially if your dough is as sticky as mine was!) Flatten the dough with your hands, turn it and flour it and work it into a rectangular shape.  This was extremely difficult for me because my dough was so sticky and ripped easily.   I kept adding more and more flour to my hands and the top of the dough and that did help.  I was nervous that I was going to overwork the dough; I had to keep reshaping it because I couldn't just lift it and turn it over.    I finally ended up with this:
Step 7:  Brush the dough with olive oil.  

                                      
Step 8:  Brush an inverted baking sheet with oil.  Lift the dough onto the baking sheet.  Ummmm....this was tough.  At this point I was seriously thinking of dinner alternatives.  I knew that just transferring the dough shouldn't be that difficult.  This dough was not normal. 
Step 9:  Prepare your toppings.  I used Mejier brand all-natural pizza sauce.  It only has a few ingredients, no crap ingredients like high fructose corn syrup, and is great for a pre-made sauce.  My other toppings were one tomato, thinly sliced, 6 slices fresh mozzarella cheese (My local grocery store makes fresh mozzarella and its so delicious), and some fresh basil.  Have your toppings on a tray or plate, ready to go.  

Step 10:  Heat the grill to medium low.  Lift the dough by its corners and lay on the grill, oiled side down.  This was so tricky.  Having Tim there to hold the pan while I transfer it would have been helpful, but with the dough I was working with it still would have been hard.  The dough immediately started slipping through the grill grates.  I had to try to lift it and reshape it as it totally lost its shape when I lifted it. 
                                                 
Once the dough was on the grill, I was thinking about what else I had in the house that I could quickly make for dinner.  Part of me wanted to just take it off and give up, by my stubborn side told me to see it through.
Step 11:  Cook the dough until it puffs up and the underside is stiff and marked.  This should take about 5 minutes.  Flip the dough with tongs and add your toppings. Allow to cook a few more minutes. This part didn't go well.  A part of the dough that had slipped into the grill grates was burned and stuck to the grill.  When I tried to turn the dough, it broke off.  I was still undeterred and didn't give up, although many would have thrown in the towel at this point.  Here are my broken off pieces of dough: :-(

I tried a few pieces of the dough and thought it tasted a bit weird.  My guess it was just the different taste of the spelt flour that I'm not used to.  It wasn't terrible, but I couldn't help but think my picky husband wasn't going to like it.  Nonetheless, I moved forward.  Here is what the final pizza looked like, with part of the crust broken off:


  The rest of the meal included a spinach salad with sliced strawberries and sliced almonds.  This is my go-to salad.  I love fresh spinach and strawberries are the perfect match.  Not only do they taste great but because they are a vitamin C source they help our bodies to absorb the iron in the spinach.  I used a store-bought balsamic vinaigrette because I was in a hurry.  I try to make my own dressing more than not, but when necessary I use a good store-bought variety.
I also had extra tomato, cheese, and basil so I made a caprese salad as well.  I layered the tomato, mozzarella cheese slice, and fresh basil, sprinkled with sea salt, freshly ground black pepper, and drizzled it with olive oil and balsamic vinegar.

By the time Tim got home, the food was already on the table.  I was so nervous that the pizza was going to be horrible, but it wasn't.  The dough tasted much better with the sauce and toppings on it, and Tim had nothing bad to say.  He will definitely tell me if he doesn't like something, so after such a fiasco cooking I was relieved he actually liked the pizza.  Next time I will probably go back to a regular whole wheat and all-purpose flour combo as that seemed to work much better.  If I mess it up again I'll know its me and not the flour! :-)

Tuesday, June 29, 2010

Hiatus Over

     I took a break from my food blog for various reasons over the past months.  I wasn't sure when I'd get back to it, and then something weird happened to me in the last few weeks.  I've found myself thinking as if I'm blogging.  It's really strange- as I'm eating or preparing a meal, I find myself thinking about what I'd write about it, actually writing the blog in my head.  I guess that was my sign that I ought to get back to the food blogging thing.  So, here I am, ready to jump back in with no particular plan in mind.  I really don't know what format I'll use; I'm not going to make any promises or declarations, but I will say that I feel like I want to do this everyday.  We'll see if that motivation continues or is just a passing fancy.
   We just got back from a two-week vacation last night, so today there was not much food in the house.  We did have some eggs and an unopened package of shredded cheese, so Meghan and I had cheese omelettes, with a little milled flax seed sprinkled in there, for breakfast.  On a side note--why is it that organic eggs last so long?  I buy local organic eggs and the expiration date on them is always like a month or more away.  It seems like in the day when I didn't buy organic or local eggs they didn't last that long.  Weird.  Anyway, Tim left for work before we were up, but I don't think he had anything for breakfast.  Hopefully he didn't stop at McDonald's.  
    There was no hope for lunch, so a trip to the grocery store was in order.  We got back shortly before it was time for Meghan's lunch, so I didn't have much time to prepare her food.   It was a quick and easy lunch day for Meghan.  I started out with about a 1/4 cup of frozen green beans.  Frozen veggies are so quick and easy, they've been a staple in Meghan's diet.  I feel good about serving them to her because in many cases they can have more nutrients than the "fresh" variety in the grocery store since the veggies are frozen so quickly after they are harvested.  Often the "fresh" veggies are traveling such a far way by the time they get to your local store they've lost a significant amount of nutrients.  So, I popped the grean beans in the microwave with a little water for 30 seconds and they were good to go.  Here she is enjoying her first course:
  This picture shows quite accurately how she feels about green beans.  Eh, they're okay.  She ate them, though, so I can't complain.  After this picture, the battery on my camera died. (You know that two-week vacation I mentioned?  We took over 500 pictures.)  So for the rest of the meal you will just have to rely on mental visualization.  After the green beans, I gave her some shelled edamame (again, frozen).  She loves her some soy beans.  I munched on a few of them, as well, because at this point I was getting a little hungry, too.  Next was a slice of bread with Vermont Monkey Business peanut butter.  This peanut butter was something we found at a little store on our vacation.  I thought it sounded so interesting--natural peanut butter with raisins and banana.  It sounds good, right?   Well, it is.  BUT.  This store had a convenient way of not putting price tags on things.  We didn't even think about it; I just assumed the pb would cost $5-6.  Wrong.  It was an $11 bottle of peanut butter!  It's good, but not that good.  Anyway, her last course was some honeydew melon.  I'm not sure what I was thinking buying a silly honeydew.  It's not in season and it really wasn't that great.  Meghan ate it, nonetheless.  She loves, loves, loves fruit.
   After Meghan went down for her nap, I could devote a few minutes to my own lunch.  I decided on a Tomato-Spinach sandwich with sliced strawberries for dessert.  Here were my ingredients:
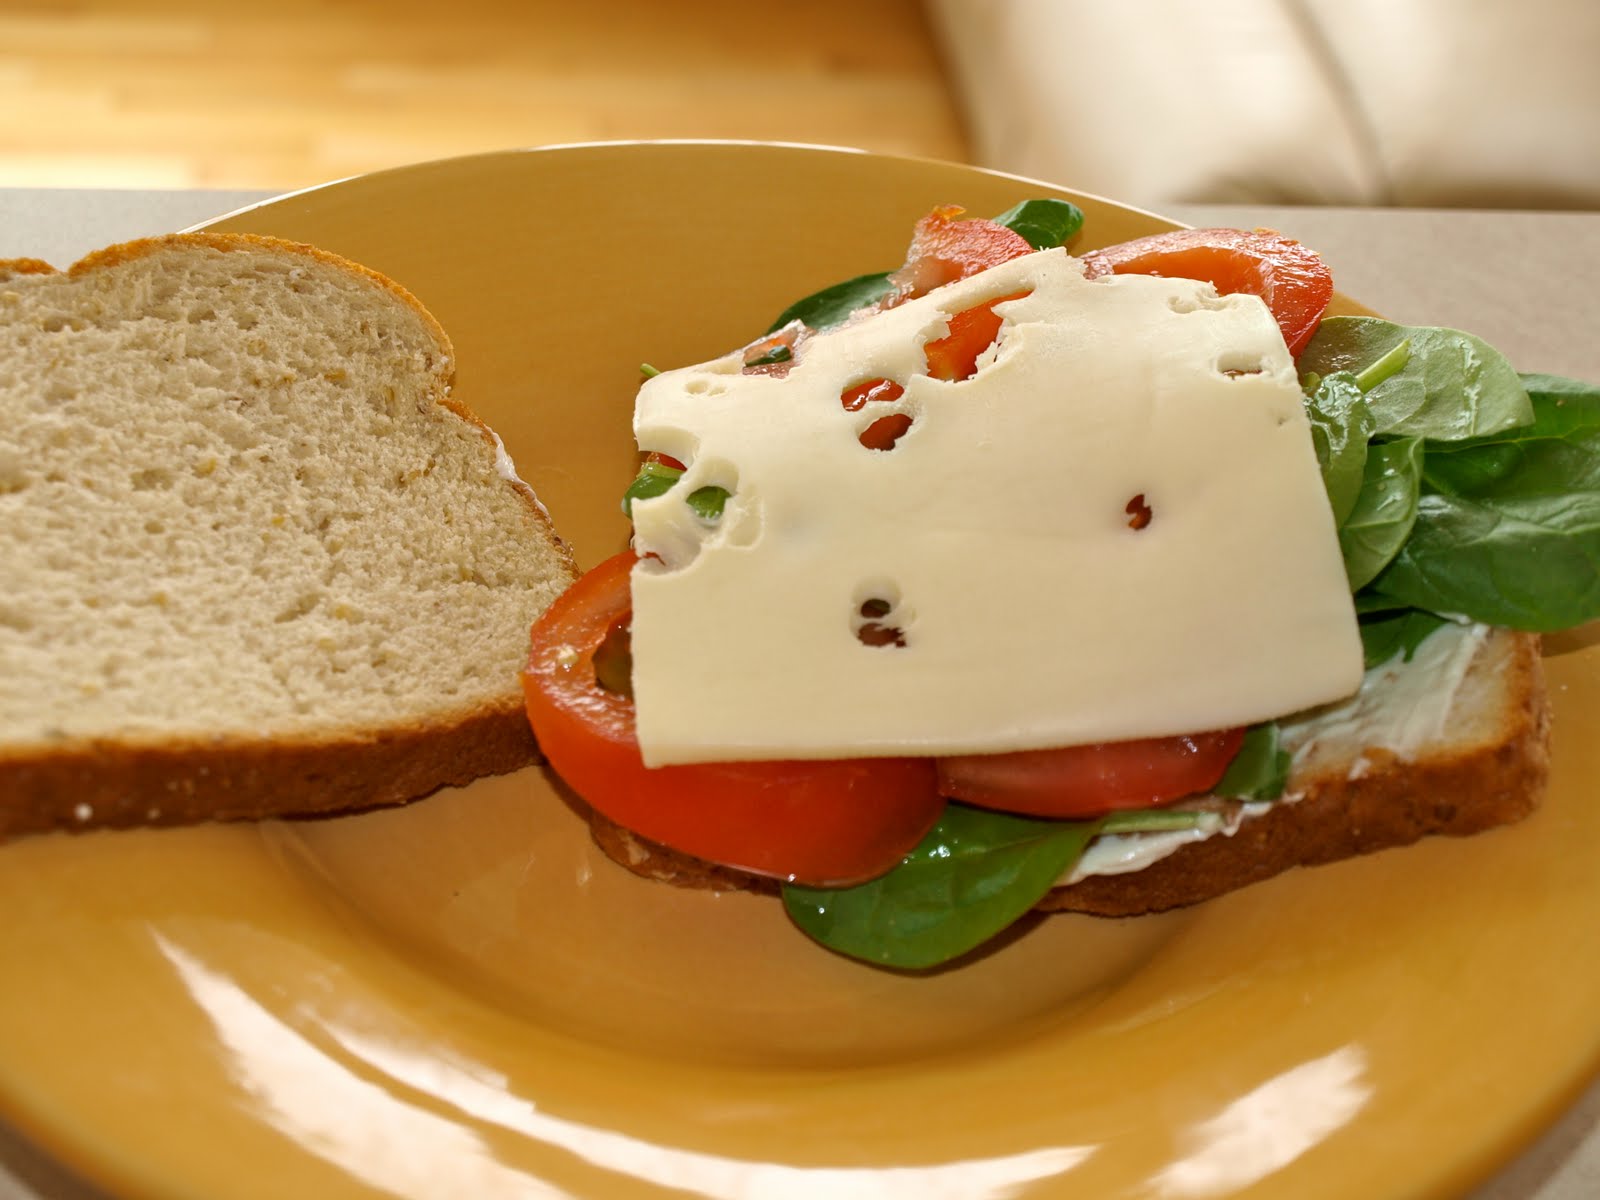
Oat Nut bread, baby spinach, a tomato, baby swiss cheese, and some Veganaise (vegan mayo).

I love warm sandwiches, even in the summer, so decided to use the panini press for this one.  I love my panini press!  Here's the sandwich before the panini press:
And here was the final result:
I couldn't fit the whole tomato on the sandwich, so I had the extra slices on the side with a tiny bit of sea salt.  Yum! This was a great lunch.
  When Meghan woke from her nap, we shared a lovely smoothie for a snack.  The ingredients were:  5 strawberries, a handful of honeydew chunks, three heaping tablespoons of plain, organic yogurt, and a tablespoon of raw honey.  It was delicious and Meghan hogged most of it.  Here is Meghan enjoying her smoothie:


    For dinner I bought a few thinly sliced, skinless, boneless, chicken breasts and a bunch of asparagus for the grill.  Don't you just love grilling season?  It's so easy and grilled food tastes soooooo good.  For the chicken I did  a simple marinade of olive oil, apple cider vinegar, cayenne pepper, and dried thyme (I didn't measure; just put in what seemed like a good amount).  I marinated it for about 2 hours before grilling.  The asparagus was the usual:  drizzled with olive oil, sea salt, and freshly ground black pepper.  Here's the chicken and asparagus on the grill:
  For another side dish, I prepared an Italian Quinoa Salad.  This turned out really tasty, so I'll share my on-the-fly recipe:

Italian Quinoa Salad

1 cup quinoa
2 cups vegetable broth
1 1/2 cups cooked or 1- 15 oz can (drained and well-rinsed) Great Northern beans
1/3 cup sun-dried tomatoes (oil-packed), chopped
2 T. pine nuts, toasted
1 large handful fresh basil, coarsely chopped
1/4 cup olive oil
2 T. red wine vinegar
1 tsp. dijon mustard

Bring the vegetable broth to a boil over high heat.  Add quinoa, turn heat to low, cover, and simmer for 20 minutes.  Remove from heat and leave cover on for 10 more minutes.
In a large bowl, carefully combine quinoa, beans, tomatoes, basil, and pine nuts.  Set aside.  In a small bowl, combine olive oil, vinegar, and mustard.  Drizzle oil mixture over the quinoa and mix until evenly coated.  Serve warm.
Yield:  6-8 servings.
Here's the complete dinner:
     As you can clearly see and read, I am not eating vegan (or even vegetarian) lately.  I am somewhat nutritionally confused.  I've been reading nutrition books with conflicting messages and trying to figure out where I stand. Right now my view is "everything in moderation".  My nutrition journey is continuing to evolve and I know I will figure out the healthiest path, eventually.
   Okay, so I don't think I'll be writing this much everyday.  I guess I was feeling overly ambitious after my long hiatus.  More realistically, I may write about one meal everyday.  We will see.

Saturday, April 10, 2010

Meatless Main Dish: Millet and Black Bean Patties with Corn

Sometimes finding meatless main dishes can be difficult.  I find a lot of my meatless meals end up being casseroles or one-dish meals.  There's nothing wrong with that, of course, but I like to have meals where I can prepare some side dishes sometimes, as well.  I was excited to try these Millet and Black Bean Patties with Corn when I saw the recipe on another blog I like to read, No Meat Athlete. The recipe is from a vegan cook book he is featuring this month, Clean Food.  I don't have this cook book, but think I will seek it out after trying this recipe as I really enjoyed it.  Even better, Tim liked the patties and Meghan ate them, too.  That is always a bonus.  These patties make a great base for a southwest-themed meal.  They were easy to prepare and the recipe yielded a lot so we have leftovers.  In case you missed the link to the recipe earlier, here it is again:  http://www.nomeatathlete.com/clean-food/  Happy meatless cooking!

Sunday, March 28, 2010

Whole Wheat Penne with Baby Bellas, Spinach, and Tomatoes

     Baby bellas were on sale at Trader Joe's this week and my thoughts immediately went to a light spring time pasta dish.  My food cravings really change with the seasons.  During the cold, winter months I inevitably crave heavy, comfort foods.  Come spring and summer, though, my body tells me to lighten it up and I usually do.  This is a simple dish that is a snap to put together.

Whole Wheat Penne with Baby Bellas, 
Spinach, and Tomatoes
1 pound whole wheat penne pasta
2 tablespoons extra virgin olive oil
3 cloves garlic, minced
1 shallot, thinly sliced
1/3 cup dry white wine
10 oz. sliced baby bellas, rinsed and lightly patted dry
1 tablespoon Italian seasoning blend
2 large handfuls fresh baby spinach
1- 28 ounce can diced tomatoes with juice


Step 1
Heat the oil in a large skillet. When the oil is plenty hot, add 
the garlic and shallot and cook 2-3 minutes until the shallot 
is soft and translucent.


Step 2
Add the wine and allow it to simmer about 2 minutes.  

*Tip:  My husband and I are not big drinkers, so buying a full bottle of wine for a recipe is usually a waste.  Instead, I buy a small bottle like this:
This bottle was only $2.00. 
Step 3
Add the mushrooms and herbs to the skillet.  Mix so that the herbs are evenly distributed among the mushrooms.  Allow to cook, stirring frequently, until the mushrooms are tender and reduced in size, about 6-8 minutes.  


Meanwhile, start boiling your water and cook the pasta according to package directions.  

Step 4
Add the tomatoes with their juice and partially cover the skillet.  Allow to simmer for about 10 minutes.  The sauce should reduce slightly.  


Step 5
Add the spinach and stir until it begins to wilt, about 2-3 minutes.  


Step 6
Add the cooked penne to the skillet and stir to mix with the other ingredients.  
Step 7
Plate and serve!  


Yield: 6-8 servings

We had a ton of leftovers. It was great to heat up 
for lunch the next day.  I especially love this meal 
because it can get it on the table in about 35 minutes!