Tuesday, March 30, 2010

Toddler Tuesday: Spinach Nuggets with a Fun Yogurt Dipping Sauce

    I was rereading part of Super Baby Food by Ruth Yaron and she lists the "Super Green Veggies" as kale, broccoli, greens, brussels sprouts, asparagus, swiss chard, okra, peas, and spinach.  She suggests that babies and toddlers (and the rest of us, too, I suppose) should have at least one serving of vegetables from this group everyday.  I have to be honest and say that Meghan only eats three of those vegetables on a somewhat regular basis (broccoli, asparagus, and peas) and she definitely doesn't get at least one serving a day.  I was inspired to try to accomplish this feat, however, and decided to try to create a kid-friendly recipe that included spinach.  I include spinach in my own cooking all the time, but Meghan doesn't usually want any part of the leaves.  This recipe for spinach nuggets was a success.  The nuggets were crispy and tasty.  These are perfect for a toddler, but would also be great for a healthy snack for older kids.  I was able to do all the prep and get them into the oven while Meghan watched Sesame Street.  They cooked in the oven and were ready by the lunch time.  While they were cooking I decided a fun dipping sauce would be appropriate, especially since Meghan seems to love dipping her foods lately.  With just a few simple ingredients, making the sauce is quite easy, and Meghan enjoyed "helping" me.  You can make the dipping sauce, or just use ketchup. :-)

Spinach Nuggets


1/4 cup sliced almonds*
2 large handfuls fresh baby spinach
1 1/2 cups whole wheat breadcrumbs, divided
2 eggs
1/4 cup flaxseed meal**
1 teaspoon basil
1 teaspoon oregano
1/4 cup shredded cheese (I used cheddar, but any kind will be fine)

*If you haven't introduced nuts to your toddler yet, try to substitute extra bread crumbs.  I started introducing nuts at age 1 with Meghan and haven't had any issues.
**If you don't have flaxseed meal on hand, you can use extra breadcrumbs here as well.  Flaxseeds are nutritional powerhouses, though, so I highly recommend you keep flaxseed meal on hand.  It's easy to sprinkle in to most any recipe or snack.  I currently use Bob's Red Mill brand.
Step 1
Preheat the oven to 350 degrees.  Spray a cookie sheet with non-stick cooking spray and set aside.
Place the almonds in the food processor and process until they turn into a fine crumb.
Step 2
Add the two handfuls of spinach and pulse until you have a green crumb-like mixture. Set aside.
 Step 3
Whisk the two eggs in a small bowl.                                                                                        


Step 4
Add the spinach-almond mixture, 1/2 cup of breadcrumbs, the flaxseed, basil, oregano, and cheese and mix until evenly incorporated.
Step 5
Place the remaining cup of breadcrumbs in a small bowl.  Using your hands, form a small portion of the spinach mixture into a ball and roll it in the breadcrumbs until it is fully covered.
Put it on the cookie sheet and press it down to form a nugget shape.  Repeat with remaining spinach mixture and breadcrumbs.  You should end up with 15-20 small nuggets.
Step 6
Bake for 25 minutes, turning the nuggets over halfway through the cooking time.  Allow to cool and serve.
Yogurt-Thyme Dipping Sauce


1/4 cup yogurt*
1/8 cup tahini (sesame paste)
juice from 1/2 lemon
1/2 avocado
1 tsp. dried thyme

Place all ingredients in blender and blend until smooth.

*I used full-fat yogurt as fat is extremely important for the developing brains of babies under 2.  If you have an older child, you may want to use low-fat or non-fat yogurt.
Here is Meghan enjoying her nugget.  Please excuse the crazy-baby hair.  She was in a I-don't-want-to-keep-my-bow-in kind of mood.  She ended up enjoying the dip a little too much and eating the rest of it with her hands. I didn't mind since the ingredients were healthy.
Later in the meal when she was having her peanut butter banana "sandwiches" (cut a banana length-wise, spread with peanut butter, put it back together, and slice), she decided to dip those as well.  Gross, but whatevs.  
Since there was a nice, big batch of nuggets, I froze them.  I put two nuggets each into small plastic bags, and then put those inside a ziplock freezer bag.  These will be simple to pull out and pop in the microwave for a quick veggie side or snack.  


Sunday, March 28, 2010

Whole Wheat Penne with Baby Bellas, Spinach, and Tomatoes

     Baby bellas were on sale at Trader Joe's this week and my thoughts immediately went to a light spring time pasta dish.  My food cravings really change with the seasons.  During the cold, winter months I inevitably crave heavy, comfort foods.  Come spring and summer, though, my body tells me to lighten it up and I usually do.  This is a simple dish that is a snap to put together.

Whole Wheat Penne with Baby Bellas, 
Spinach, and Tomatoes
1 pound whole wheat penne pasta
2 tablespoons extra virgin olive oil
3 cloves garlic, minced
1 shallot, thinly sliced
1/3 cup dry white wine
10 oz. sliced baby bellas, rinsed and lightly patted dry
1 tablespoon Italian seasoning blend
2 large handfuls fresh baby spinach
1- 28 ounce can diced tomatoes with juice


Step 1
Heat the oil in a large skillet. When the oil is plenty hot, add 
the garlic and shallot and cook 2-3 minutes until the shallot 
is soft and translucent.


Step 2
Add the wine and allow it to simmer about 2 minutes.  

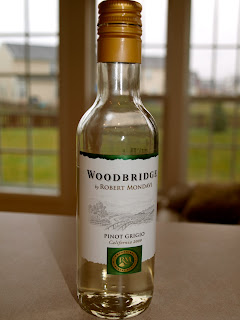
*Tip:  My husband and I are not big drinkers, so buying a full bottle of wine for a recipe is usually a waste.  Instead, I buy a small bottle like this:
This bottle was only $2.00. 
Step 3
Add the mushrooms and herbs to the skillet.  Mix so that the herbs are evenly distributed among the mushrooms.  Allow to cook, stirring frequently, until the mushrooms are tender and reduced in size, about 6-8 minutes.  


Meanwhile, start boiling your water and cook the pasta according to package directions.  

Step 4
Add the tomatoes with their juice and partially cover the skillet.  Allow to simmer for about 10 minutes.  The sauce should reduce slightly.  


Step 5
Add the spinach and stir until it begins to wilt, about 2-3 minutes.  


Step 6
Add the cooked penne to the skillet and stir to mix with the other ingredients.  
Step 7
Plate and serve!  


Yield: 6-8 servings

We had a ton of leftovers. It was great to heat up 
for lunch the next day.  I especially love this meal 
because it can get it on the table in about 35 minutes!

Thursday, March 25, 2010

Snack Attack: Healthy Vegan Carrot Spread

   I have an affinity for snacking. When my body is telling me it's hungry, I'm just not good at saying, "So sorry my friend, you must wait until the next scheduled meal".  So I don't.  When I'm hungry, I eat.  (And sometimes when I'm bored, too, but I'm working on that.)  The problems lies with the crazy over-processed convenient snack foods that line our grocery store shelves.  When I'm hungry for a snack, I want it now, not in the twenty or thirty minutes it would take me to prepare something fresh.  But I don't want to put all the crap ingredients into my body that come with those quick-and-easy pre-packaged snack foods.  My solution is to prepare fresh foods ahead of time, so when hunger strikes my snack is ready.  I especially love dips and spreads.  They are perfect for munching on fresh vegetables (pre-cut, of course) or spreading on crackers.  I often prepare a large enough portion of a dip or spread so that it will last me a week.  If you're really sharp you are probably thinking, "Hey, aren't crackers full of junk ingredients?".  Good work. Yes, they often are.  You can find crackers that are more healthy than the standard ones, however.  The brand that I have found to have the best ingredients is Kashi.  You want to look for crackers that use whole grain flours only and don't have hydrogenated oils.

    The snack I'm highlighting today is called Curried Carrot Dip and it is slightly modified from Veganomicon.  Veganomicon is full of great recipes, but my favorites are the dips, spreads, salad dressings, and sauces.  They are always relatively simple and really delicious.  Now, in the title I call this a spread rather than a dip.  I use it more as a spread, but it can be used as a dip as well.  It's versatile!  An added bonus is that Meghan, who prefers green vegetables to orange, will eat this dip if I spread it on a cracker.  So this is one way I get some carrots in her.  Isn't that strange? Most toddlers I know love the orange veggies.  Nonetheless, this can be a healthy snack for your toddlers or older children, as well. 

Curried Carrot Dip

1 pound carrots, peeled and cut into 1/2 inch pieces
1/4 c. roasted sunflower seeds (salted)
2 teaspoons vegetable oil of your choice (I use grapeseed oil as that is what the original recipe suggests)
1 clove garlic, minced
1  tsp. curry powder
1/2 tsp. ground cumin
1 tbs. fresh lemon juice
dash cinnamon 

Cook the carrots by steaming them, about 10 minutes or until soft.  Allow them to cool.  

In a blender or food processor, pulse the sunflower seeds until they are crumbs.  Add the rest of the ingredients and continue to process until the mixture is smooth.  You may need to scrape down the sides a few times to make sure everything is evenly incorporated.  Allow to chill in the refrigerator for 30 minutes and then serve.  If you can't wait, go ahead and dig in!  

This dip is great on crackers, as a sandwich spread, or with fresh veggies.  This is a quick (especially once prepared), healthy snack you can feel great about eating.  


Tuesday, March 23, 2010

Toddler Tuesday: Cheesy Broccoli, Rice, and Beans

  I thought I would dedicate my Tuesday blogs to toddler food.  Feeding a toddler is a challenging task as their taste memories are so short.  One day Meghan will LOVE, LOVE, LOVE a certain food, and the next day act like she has never tasted something so disgusting.  Since I am always looking for new ideas, I thought I would put out there some of the healthy meal or snack options that have worked for us.
    I only cook meat once a week (at the most) so that is how often Meghan is offered meat.  She often refuses it when I offer, so it is not unusual for her to go weeks without any meat.  Because of this I am careful to prepare foods for her that provide the nutrients she would normally get from meat, such as protein and iron.  I try to include a variety of whole grains, vegetables, beans, legumes, and fruit in her diet.  For dinner she typically eats what we are eating.
                                                        This was her lunch yesterday.

In typical toddler style, she ate each part separately, picking out the beans and eating those first, then the broccoli, and finally the rice. This is a well-rounded meal that is packed with nutrients. The rice and beans together provide a complete protein, the beans are a good source of iron and fiber, and the broccoli is, well, a super food. Oh, right, the cheese.  That makes it taste better.  Here's the basic "recipe",  but you can't really call it that. ;-)

Cheesy Broccoli, Beans, and Rice
1/2 cup cooked brown rice
1/4 cup steamed broccoli florets, chopped to toddler size bites
2 tablespoons cooked white beans (I used canned organic navy beans. If you use canned, organic usually has less salt)
2 tablespoons shredded mild cheddar cheese

Place rice, broccoli, and beans in a small microwavable bowl.  Top with cheddar cheese.  Microwave for 10-30 seconds, until cheese is lightly melted.  

Yield:  1-4 toddler servings, depending on your little one's appetite

Monday, March 22, 2010

Dinner Tonight: Salmon with Dill-Tahini Sauce and Roasted Vegetables

    Some of you who have been following my blog might be thinking, "Wait a minute! I thought this was a vegan blog!".  Please allow me to clarify any misconceptions.  While my husband and I challenged ourselves to eat vegan for a month in January, I am not a true vegan.   I consider myself more of a flexitarian.  I think eating a plant-based diet is the healthiest way to live and I strive to eat 90% vegan, but old habits die hard and I haven't been able to give up 100% of animal products.  Cheese, without a doubt, is the hardest to give up, although I have cut back on that indulgence drastically since our vegan challenge. Because my husband loves meat, I prepare him a meat (usually chicken or turkey) dinner approximately once per week.  Sometimes I eat a small portion of the meat, maybe two ounces, other times I don't.  I also occasionally eat fish, as you can tell from the title of this post.
    Whenever I don't feel much like cooking, I turn to my oven.  Roasting foods is an easy way to create a delicious dinner with minimal prep.  Roasting vegetables produces a deep, concentrated flavor that is difficult to beat.  Roasted vegetables are perfect during the chilly fall or freezing winter months, but also work on a rainy, spring day like today.  Roasted vegetables can go with just about anything.  I often toss them with whole wheat linguine with just a little olive oil and maybe a squeeze of fresh lemon.  They are a great side dish that can round out any meal, as well.  It's a great way to use up the hodgepodge of leftover veggies in your fridge at the end of the week.
   I prefer to keep small portions of fish in my diet because I feel that is the best source of the all-important omega-3 fatty acids.  While you can get omega-3's from plant sources, such as flaxseeds, the omega 3's in plants come in the form of ALA, which our bodies cannot efficiently convert to the types the experts agree are most beneficial:  EPA and DHA, both of which are found in fatty fish such as salmon.
   There is a legitimate concern, however, about mercury content and contaminants found in fish sources today.  In order to ensure I am eating the purest fish possible, I avoid farm-raised salmon and only purchase wild Alaskan salmon.  While no fish is going to be 100% pure, wild Alaskan salmon is the closest you will find, with much higher levels of omega 3's than farmed.  Farmed salmon are injected with chemicals, artificial coloring, and antibiotics.  No thanks!
     Price, however, can become a serious issue. My beloved local grocery store, Dorothy Lane Market, prices their wild Alaskan salmon at a cool 32 bucks a pound.  Wowzers.  Needless to say, we didn't have any salmon at our house for quite a while.  Then I discovered these frozen wild salmon fillets at Wal-Mart. Now, obviously fish that has never been frozen has superior taste to fish that has been frozen, but at $4.00 a pound, I am willing to sacrifice a little taste.
    Tonight's dinner was truly a result of using up the last of the groceries before my weekly trip to the store to restock.  I had the salmon in the freezer, a bunch of random vegetables to use up, and picked the sauce based on what I had on hand.  The Dill-Tahini sauce I used is a slight variation from a recipe in Veganomicon. It paired well with the salmon even though it clearly was not created to be a sauce for salmon.  I made the sauce at lunch time so that dinner preparation would go even faster.

Dill-Tahini Sauce
1/2 cup room temperature tahini*
1/2 cup room temperature water
1 clove garlic, minced
juice of one lemon
2 tablespoons olive oil
1 tablespoon balsamic vinegar
1/2 teaspoon paprika
1/4 teaspoon salt
1/8 generous cup dried dill weed

Combine all ingredients in a blender or food processor and blend it until smooth.  Serve at room temperature.

*If you aren't familiar with tahini, it's sesame seed paste, and very delicious!  You can find it in either the Asian or health food section of your supermarket.  It's great on sandwiches, in soups, or as a base for dips and sauces.

I didn't use a recipe for the salmon or vegetables, but I will give you a rough idea of the process (very easy!).

Basic Roasted Vegetables

approximately 1 pound Yukon gold potatoes, cut into 1-inch wedges
1 large red bell pepper, cut into 2-inch pieces
1 medium zucchini, cut into thick slices
8 oz. white mushrooms, halved
olive oil
salt
pepper
rosemary
thyme

Preheat oven to 425 degrees.  Place prepared veggies in large baking dish.  Drizzle with olive oil.  Sprinkle with sea salt, freshly ground black pepper, and dried spices of your choice.  (Today I used rosemary and thyme)  Roast in the oven, uncovered, for 40-50 minutes, until vegetables are browned and vegetables are tender.  (Check the potatoes as those take the longest to cook)  You can roast just about any vegetable, so be creative with your choices and combinations.

Roasted Salmon
4- 4 oz. salmon fillets
juice from 1/2 lemon
salt
pepper
olive oil

Preheat the oven to 425 degrees (mine was already preheated and had veggies cooking).  Lightly oil a baking dish and place your fillets in the dish.  Lightly brush a small amount of olive oil on each fillet.  Sprinkle the fillets with kosher salt and freshly ground black pepper.  Squeeze the lemon so the juice is evenly distributed among the fillets.  Place in oven and cook approximately 15 minutes, until salmon easily flakes with a fork.

This was enough to feed me, my husband, and my 18-month-old daughter.  Tim ate 3 of the fillets and Meghan and I shared the fourth.  We all polished off the vegetables.  I tend to think we have larger appetites than the average family, so if you have a bigger family this may be plenty for you.


Thursday, March 18, 2010

A Tasty Way to Eat Your Greens

In honor of St. Patrick's Day, albeit a day late, I thought a post about eating greens would be appropriate.  But I have a confession to make.  I don't always love the ever-so-healthy leafy greens.  I like the basics:  spinach, romaine, broccoli.  When it comes to the more obscure greens, like collards, kale, or chard, I have a hard time stomaching them.  I have tried to hide them in soups, and that works, but anytime I try them in a regular dish I find them bitter and not at all tasty.  So I was quite skeptical when my friend Laurie told me about a way to eat kale that in her words, "tastes like popcorn".  After trying it myself I'm not sure if the popcorn description is completely accurate, but it does turn kale into a tasty snack or side dish.  How much more healthy snack can you get than munching on a bowl of KALE?  Believe me, it is totally delicious and satisfying; I urge you to try it.   Even my husband, who routinely informs me that he "doesn't really like leafy green things" loved this.


Crispy Oven-Baked Kale

1 medium bunch kale
1 tablespoon olive or coconut oil
1/4 teaspoon salt, or to taste

Preheat the oven to 400 degrees.  Line a baking sheet with tin foil and lightly oil.  Wash and thoroughly dry the kale, then use a knife to devein it.  Then use your hands to tear the kale into bite-sized pieces.  Place the kale on the baking sheet.  Drizzle with olive oil and salt and toss to coat.  Cook in the oven 5-10 minutes until kale is crispy.  Watch closely--do not burn.  
Here is the kale before being baked.  As you can see it cooks down a lot.  The amount of salt you use really depends on your taste; you may have to try this recipe a few times to see what suits you.  

Tuesday, March 9, 2010

Behold: The Avocado

     If there is a food that you should hold on a pedestal, it is the avocado.  This poor fruit has taken a beating and suffers a bad reputation, mostly because of its high fat content.  It's a shame, really.  Here's a news flash:  our bodies need fat.  Truly.  In fact, according to the USDA, the average adults needs 65 grams of fat per day.  The reality is we need to get this fat from somewhere, and the best place ain't french fries, folks.
     Avocados are notably higher in fat than most fruits and vegetables.  The type of fat in avocados, however, is the healthy variety.  The majority of the approximately 27 grams of fat in a medium avocado is monounsaturated.  This is the type of fat that can lower bad cholesterol levels when it is eaten in place of the bad fats.  Just to be clear, the bad fats come almost exclusively from animal foods.  In addition, the fat in avocado can help the absorption of certain nutrients and aid the digestion of carbohydrates.
   Another reason avocados are often snubbed is their high caloric content.  Compared to other fruits and vegetables, avocados are quite dense with a medium avocado providing approximately 320 calories.  Rarely does a person eat a whole avocado in one sitting, however, and with all the nutrition, in my book those are some well-spent calories.  Besides, if you are following a primarily plant-based diet, the amount of calories you consume becomes much less relevant.
   Now that I have defended the avocado's supposed vices, I can get to the good stuff.  Avocados are a nutritional powerhouse.  Ounce per ounce, avocados have more protein, magnesium, potassium, thiamin, riboflavin, niacin, vitamin E, and vitamin K than any other fruit.  In all, the magnificent avocado contains 20 different vitamins, minerals, and phytonutrients.  This is why the avocado has been coined a "super food".
   Most Americans enjoy avocados in one way:  as a dip known as guacamole.  I love a good guac as much as the next person, but avocados have so much to offer it is so worth expanding its culinary uses.  Avocados can be sliced and put on sandwiches or salads, used to create healthful spreads or dips, or as a star ingredient in a delicious smoothie.  One of my daughter's first foods around 6 months of age was mashed avocado, and as a toddler she enjoys plain avocado chunks as one of her staple foods.  Don't be afraid to get your children eating avocados at a young age.
    My favorite sandwich in the whole world is one that includes avocado.  I found the recipe for this sandwich years ago in a book called Food for Life.  It includes 1/2 an avocado, a few slices of a tomato, 3-4 slices of cucumber, a little romaine lettuce, and some vegan mayo on toasted whole wheat bread.  So good.


 Another great way to use avocados is in a fruit smoothie.  It's a quick breakfast you can take on the go or a filling snack.  Here's a recipe that makes a nice, creamy smoothie:

1/2 cup plain yogurt (dairy or non-dairy)
1/4 cup milk (dairy or non-dairy)
1/2 avocado, cut into cubes
1 tablespoon agave nectar 


Place all ingredients in a blender and blend until smooth.  If you don't have agave nectar on hand, try honey or pure maple syrup.  

  Rarely do I make a food shopping trip when I don't pick up an avocado or two. When shopping for avocados, keep in mind when they will be used as you choose.  If it will be used right away, look for one that is firm, yet gives a little when you squeeze it.  If you have a few days before you'll use it, then find one that is hard without much give.  If you have an avocado that you want to ripen quicker, keep it at room temperature on your counter.  Avocados quickly go from ripe to overripe, so if you have one that seems ready to eat but you aren't going to consume it right away, keep it in the refrigerator to preserve it longer.  When you eat half of an avocado, you can save the other half by preserving the pit and keeping the unused portion, with pit in tact, in an air-tight container in the fridge.  The second half usually needs to be eaten within 24 hours.  If you notice it is a little brown when you go to eat it, you can usually scrape off the top layer of brown and reveal the nice, green flesh underneath.  

Monday, March 1, 2010

Fruity Snack Bars


  Before my last trip to the grocery store, Tim asked if I would pick up some granola bars.  He wanted something with a little sweetness that wouldn't be unhealthy.  After being "that girl" and reading the label on every available granola or cereal bar, I decided I would just have to make my own for him.  Most of the bars had high-fructose corn syrup, an ingredient we avoid as much as possible, and those that did not had a lot of added sugar.  I created these bars, that are more like cookie bars than granola bars, with intentions of the final product being high in fiber and low in sugar.  Without any eggs, butter, or added sugars, these bars are tasty treats that could be a snack or a dessert.

Ingredients

1 cup whole wheat flour
1 cup rolled oats
1/2 tsp sea salt
1/4 cup canola oil
1 tsp pure vanilla extract
1 cup raisins
1 cup pitted prunes
2 small, ripe bananas
1/2 cup vegan chocolate chips

Preparation


Preheat oven to 325 degrees.  Oil an 8-9 inch square baking pan.  In a medium bowl, blend flour, oats, salt, oil, and vanilla with fingers until evenly mixed.

Mince the raisins and prunes together in a food processor and place in bowl with batter.  Mash the bananas with a fork or potato masher and add to the bowl.  Use your hands to blend together well until evenly incorporated.  Fold in the chocolate chips.

Press the mixture into the prepared pan.  Bake for 30 minutes.  Allow to cool, and cut into 16 squares.

Yield:  16 bars

Nutritional Information
Serving Size:  1 bar


Food energy: 157kcal
Saturated fatty acids: 0.54g
Monounsaturated fatty acids: 2.34g
Polyunsaturated fatty acids: 1.08g
Total fat: 3.97g
Calories from fat: 35
Cholesterol: --
Carbohydrate, by difference: 29.99g
Total dietary fiber: 3.28g
Protein: 2.57g
Total sugars: 13.57g
Calcium: 15mg
Iron: 0.90mg
Sodium: 74mg

Recipe Notes


If you want to be really saintly, substitute unsweetened apple sauce for the oil and cut out the chocolate chips.  Please note, however, that most of the sugars are from the bananas, prunes, and raisins, and that only 1 gram sugar per serving is from the chocolate chips.