Thursday, July 29, 2010

Vegetarian BBQ Loaf with Baked Beans

   We are getting ready to go out of town for a week, so this was my let's-try-to-use-up-all-of-the-food-in-the-house meal.  When I looked in the fridge and saw we had carrots and celery for vegetables (and not much else) I immediately thought of making a veggie "meatloaf".  Then I realized that's sort of a winterish dish, so I thought I'd put a summer spin on it by using BBQ sauce and accompanying it with baked beans.  It's hard to find a good BBQ sauce that doesn't have high fructose corn syrup.  Most have that ugly ingredient number one on the list.  It's worth it to take the time to find a good one that doesn't have HFCS and isn't too high in sugar.  (Finding one without sugar is nearly impossible--let me know if you know of a brand that makes doesn't have it!)
   I've made a lot of variations of veggie loaves/patties/balls and I love that you can vary your ingredients based your mood or what you've got on hand.  This version turned out really well and I'll definitely make it again.
Gather your ingredients:


Vegetarian BBQ Loaf

3 carrots
2 celery stalks
1/2 onion (I used 1/2 'cause Tim isn't a big fan of onions--feel free to use the whole thing)
1 cup walnuts
2 eggs
1/3 cup BBQ sauce + more for topping
2 tablespoons reduced-sodium tamari (or regular soy sauce)
1 teaspoons stone ground mustard
1/2 cup shredded cheddar cheese
1 1/2 cups whole grain bread crumbs (not pictured) 

Step 1:  Preheat the oven to 350 degrees.  Oil spray a loaf pan and set aside.  

Step 2:  Peel your carrots and cut them into large chunks.  Cut your celery and onion into large chunks.  Put them in your food processor and process until they are chopped.  Add the walnuts and process until you have a mushy-textured mixture. Set aside.

Step 3:  In a medium bowl, beat the eggs.  Add the BBQ sauce, tamari, and mustard and stir to combine.  Add the cheese and breadcrumbs and knead the mixture with your hands until it is well mixed and holds together.    

Step 4: Transfer mixture to loaf pan and press it down.  Spread the top with BBQ sauce.  Bake for 45 minutes.  Allow to stand for 15 minutes before serving (this gives the loaf a chance to set).  Slice and serve.  

Yield:  8 servings 

                                 
I'm not sure how I could make this loaf look pretty, but trust me, it tasted good.  Tim gobbled up 3 helpings and Meghan, who is being Miss Picky these last few days, ate some as well. 

The baked beans were from 1,000 Vegan Recipes and were delicious, too.  They were sweetened with maple syrup and extremely tasty.  I'd call this clean-out-your-pantry dinner a big success.  

Wednesday, July 28, 2010

Hoppin' John Salad for Lunch

     Hoppin' John is a beans and rice dish from the south that is traditionally made on New Year's Day for good luck.  I don't know about you, but I need good luck all throughout the year, so I have no problem making this salad right smack in the middle of summer.  The best thing about it is that you can make it one day (or night) and have a healthy, convenient lunch ready for the next 3-4 days.  The original Hoppin' John dish is made with bacon and who knows what else--I'm not from the south--but this salad version is much healthier.

   I originally encountered this recipe when my mom was diagnosed with cancer in 2007 and I started my nutrition mission.  Cancerproject.org is home to a group that promotes a plant-based diet for cancer survival  and they have a free cook book that I downloaded, The Survivor's Handbook:  Eating Right for Cancer Survival.  Even for someone without cancer, this is a great resource for transitioning to a plant-based diet and has a ton of great recipes!  They have a Hoppin' John Salad recipe that was the inspiration for my salad.  I made a few changes to make it more colorful and crunchy, but you should check out the book because the original recipe is great, too.

Hoppin' John Salad
Adapted from The Survivor's Handbook:  Eating Right for Cancer Survival


For the salad: 
1 (15.5 ounce) can black-eyed peas, drained and rinsed
1 cup cooked brown rice
1/2 cup finely sliced green onions
1 celery stalk, finely sliced
1 large carrot, cut in half length-wise and thinly sliced

For the vinaigrette:
1/4 cup rice vinegar
1 tablespoon olive oil
1/4 teaspoon salt

In a small bowl, whisk together the rice vinegar, olive oil, and salt.  Set aside.  In another bowl, mix together the salad ingredients.  Drizzle the vinaigrette over the salad and mix gently.  If you have time, refrigerate for a few hours.  If you need it now, eat it right away!  Serve alone or over a bed of spinach or your favorite lettuce/greens.

Yield:  4 large servings (main course) or 8 small servings (side dish)


Tuesday, July 27, 2010

Toddler Tuesday: Have Fun with Food

   More than anything, I want eating to be for Meghan what it should be for everyone: a pleasurable experience.  Sure, there are times when I get stressed that she is refusing to eat as many vegetables as I think she should or when I wonder if she is eating enough at all.  But I always try to hide any anxiety I have from my toddler.  I don't want to create a negative association with eating.  So when it's meal time, I try to keep the mood relaxed, and even have a little fun.
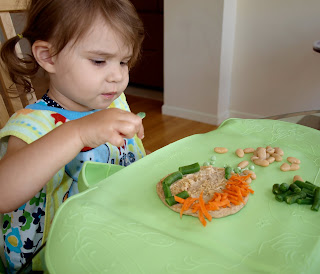
  Here's the little man that greeted Meghan for her lunch a few days ago.  There's so many ways you can turn food into a face or animal and your toddler (especially older toddlers) will think it's funny.  And maybe it will even help entice him into eating something new.  Here's what I did for the man face: 

I started with a half of an Arnold Sandwich Thin.  Have you seen these things? I recently discovered them and love them!  They give a perfect flat, round surface for the head.  I spread it with a little Sesame-Nut Spread (which I totally just made up as I was making lunch).  Here's what I used in equal parts: 
                                          
peanut butter, tahini (sesame seed paste), and goat's milk yogurt (any plain yogurt would work).  One teaspoon of each in bowl, a quick mix, and I had a spread for her sandwich.  Then I added the shredded carrots for the hair, beans for the eyes and nose, and some green beans made the smile.  The verdict? 

                                         
She ate the beans right away, smiling when I said, "Ooooh, you ate his eyes!  Oh, there goes the nose!" Yep, I'm such a dork.  But I love making her smile.
                                         
Then she ate a few of the green beans.  

                                           
    She soon realized how tasty the spread was.  She kept dipping her finger into the spread and eating it. She did not touch the carrots.  I have the hardest time getting her eat orange veggies.  Her favorites are the green ones.  Eventually I tore the bread into pieces for her and she gobbled that up.  

   The next day I made a heart-shaped sandwich for her using similar ingredients. (Can you tell I was trying to use up certain things from the fridge?)  Such an easy way to make meal time a little more fun. Cut the sandwich into whatever shape you think your toddler will appreciate.  
     
Since Meghan will usually eat sandwiches well, I decided to try to made a hearty sandwich spread with the carrots to see if she'd eat it that way.  She liked it!  Woo hoo!  

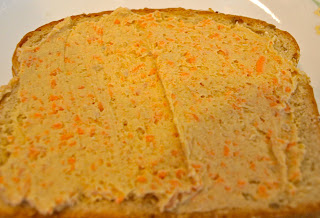
     For this one, I put 1 tablespoon shredded carrots, 1 tablespoon white beans, and 2 tablespoons tahini, and a small pinch of sea salt in the food processor and processed it until it was of a spreadable consistency.  (A blender might work for this, too)  This is what it looked like when I spread it on the bread: 

                                              
Then I just put on a top and cut it into a heart shape (she doesn't usually eat the crust anyway).  

                                            
Heart is one of the shapes she knows, so she was so happy that she could identify it.  Here she is eating the sandwich:

                                                  
She ate about 3/4 of the sandwich.  I finished it for her. :-) 

  Tahini is a cool ingredient to use with toddler food.  It has a sweet-ish, nutty taste to it, which I'm sure is why Meghan enjoys its flavor.  It is a good source of protein, healthy fat (essential for brain development!), fiber, folic acid, calcium, iron, magnesium, potassium, and zinc.  It's a great base for sauces, dips, and spreads.  
    So, how do you have fun with your toddler's food?  
  

Monday, July 26, 2010

Back on the Running Train

   As a high school and college athlete, I was accustomed to having my workouts built into my normal day. There was no thinking or extra motivation needed:  it was inevitable that I had to show up (blowing practice off to watch The Bachelorette was not an option) and someone told me exactly what to do.  I always worked hard because I am a competitive person and wanted to do well for my team.
   Post college, however, things were different.  Here I was, for the first time ever, having to do it all on my own.  You'd think it would be easy given I'd been physically fit my entire life and working out regularly was pretty much part of my fiber by then.  You'd think.  This was so not the case.  Going to a gym to jump on a treadmill and maybe lift a few weights, all on my own accord...let's just say it wasn't easy.  All of a sudden there was no one there to tell me exactly what to do.  There was no one watching me, which of course is a great motivation to put forth maximum effort.  I could totally slack and there was no one to push me to try harder.  It was just me and to be quite frank, it was boring.
   Making the situation even more dire was that my two sports were basketball and track.  I loved playing basketball and to me playing a game was a much more fun way to work out than doing some aerobics class or getting on an exercise machine.  I searched for a women's basketball league, to no avail.  Men's leagues are a dime a dozen, but apparently there aren't enough women ballers out there to form leagues.  In track, I was a sprinter.  Running more than 2 miles at a time just seemed silly.  How do you translate sprinting into a post-collegiate workout?
   Ugh.  I was lost.  I made efforts to go to the gym and I did okay.  I'd go in spurts of some weeks getting there 4 or 5 times, and other weeks not going at all.  I never found the consistency that came with being on a team.
   A twist of fate may have shaped my exercising future.  I moved to Arizona from Michigan one year after I graduated college.  With a new, much more user-friendly climate, I found some motivation to run longer distances.  There's something about the sun shining every day that makes you not want to sit on the couch.  It was weird to learn to run slower for longer distances, still with my sprinter mentality, but eventually grew to like it and started running in road races.  I trained with a running club and ran in a few 5Ks here and there. I even trained and completed a half marathon.  I'd found a competitive outlet that I thought wouldn't be available to me, and I felt good about my level of physical fitness.
  
 Then I had a baby.  

   'Nuff said, right?  Workouts became secondary to my new world of middle-of-the-night feedings, nap schedules, diaper changes, and just falling totally in love with this new person in my life.  Luckily, breastfeeding helped me get back to my pre-pregnancy weight pretty quickly.  But being your ideal weight and feeling healthy are not always one and the same.  
    Meghan is almost two and I've found myself again unable to find consistency in my workouts.  It's been up and down since she was born.  Tim and I went through a P90X period, I started the whole gym routine again, and I've done a lot of walking with Meghan.  I feel like I'm finally ready to get back on the running train.  
   My first run reminded me that taking a few years off from running is not a good thing.  Getting back into running shape stinks, being in running shape is wonderful.  I know I just have to get there again. 

Here I am after the run, looking like a big dork with a goofy smile and sporting my camelbak.  It was a hot day, though, so it was a must.  
   After downing even more water, I immediately gobbled down a few watermelon slices.  The watermelon was refreshing and I felt like I'd accomplished a great feat.  Getting back on the train is difficult, but staying on is even more so.  Here's to hoping I can stay on the train.  

Sunday, July 25, 2010

Red beans and rice did miss her!

    When I told Tim we were having 'beans and rice' for dinner, he busted out with some Baby Got Back lyrics, so I couldn't resist using them as my title.  Black beans and rice would be more accurate, however.  This is a recipe adapted from Vegan Yum Yum, which is a fantastic vegan cook book.  Not one recipe has yet to let me down from this book.
   The best part about this dinner is that it has kale--and I still like it.  There seem to be an abundant number of vegan and vegetarian bloggers out there who claim to love kale.  I wish I could say I fell in this camp but then I would just be a poser.  Kale, in my very humble opinion, does not taste good.  At all.  Unless it's in the form of kale chips, I'm never too impressed with this particular leafy green.  That being said, I know I should try to sneak it into my diet every now and then since it has super nutritional properties and those super green veggies are the ones we should be striving to get the most of in our diets.
    And here is where Tahini Lemon Rice and Beans comes in to save me from my kale-hating ways.  Now, I had to adjust this recipe some because in addition to the kale, black beans, and brown rice it calls for, it also includes seitan.  I have only had one seitan experience.  I tried to make it homemade using the recipe from Veganomicon , and the results were not pretty.  I can usually choke down my cooking disasters even when I know it isn't the most delicious thing I've ever tasted, but this--this was completely inedible.  So right off the bat seitan was eliminated from the ingredient list.  I can't say what it would be like with the seitan, but without it, it was delicious.  So good that as I am writing this I wish I had a plate in front of me even though I just had lunch.  The kale blends right in with the dish and I couldn't taste any of its normal bitterness. The sauce is incredibly rich and creamy.  I'm pretty sure I'll be making this dish again very soon as I am salivating just from writing this description.
   Let me warn you before I get to the recipe:  it isn't a pretty meal.  Tim suggested I not photograph this one.  I went ahead and took the picture because I know I like seeing what something is supposed to look like before I make it.  Cook books with color photos are my favorite.  :)

Tahini Lemon Rice and Beans
Adapted from Vegan Yum Yum 


1 cup brown rice
Tahini Lemon Sauce (recipe below)
Coconut oil for sauteing
1/2 bunch kale, deveined and chopped
1 1/2 cups cooked black beans, or one 15.5 ounce can, rinsed and drained

Tahini Lemon Sauce
1/4 cup low-sodium Tamari or soy sauce
1/4 cup tahini
Juice from 1 large lemon (about 2 tablespoons)
2 tablespoons rice vinegar
2 tablespoons Worcestershire sauce (I use regular rather than vegan varieties since I'm not a vegan and don't necessarily need my meals to be completely animal-free)
2 tablespoons water
2 tablespoons olive oil


Step 1:  Start cooking the rice according to the package directions or however you normally cook your rice.

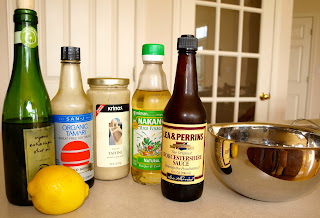
Step 2:  Make your sauce.  Simply whisk all the ingredients together (see my lovely ingredients picture above?)  in a bowl and set aside.

Once your rice is getting close to being done, start the next step.

Step 3:  Heat a small amount of oil in a saute pan and add the kale.  Once the kale starts to wilt, add the beans and heat through.

So happy all this kale was part of the meal!!  

Step 4:  Stir in the sauce and turn off the heat.   Cover until the rice is finished.  Once the rice is finished cooking, add it to the pan and toss to coat.  

                                         
I told you it wasn't pretty, but remember it is oh so good!

Meghan took one look at this dish and said, "Oooh! Oooh!", which, by the way, is her way of saying, "Noooo!  Noooo!" because she doesn't pronounce her n's yet.  This was frustrating because I know this is one meal she would like if she would just taste it!  She hasn't yet learned the value of not judging a meal by its looks and I don't think she's quite old enough for me to apply the "you must at least taste everything" rule.  She did eat some black beans once they were removed from the other offending ingredients and made to look completely plain.  Secretly, I think Tim and I weren't too upset that she didn't eat any because that meant there was more for us. 

Friday, July 23, 2010

8 Ways to Curb Weight Gain

    Did you know that the average adult American gains two pounds per year? So if you're the average bear you can count on gaining a cool 20 pounds as you move from your 20's to 30's.  Maybe you're an above-average kind of person.  If that's the case you could be looking at gaining 30 pounds.  If you're lucky and a little below average, maybe it will only be 10 pounds. None of this sounds very good, does it?  The exciting news is that you can completely buck the trend and maintain your weight (or maybe even lose a little) by being aware of the situation and following the tips below.

    While genes certainly play a role in everyone's weight, that doesn't mean it can't be controlled.  Even with pretty good genes on my side, I gained the freshman 15 right along with most other college girls.  I hated the way I looked and felt and it made me work hard, so I quickly lost it during the following summer.  I've experienced weight gain here and there, but have always kept it in control and not allowed myself to be content gaining a few pounds because as you read above, those few pounds add up over the course of time.  A few pounds are easier to lose than 20 or more so taking control early can help curb long-term weight gain.  I have maintained my ideal weight (which happens to be the same weight I was at age 16) into my 30's by applying the tips you'll read below.  I hope they can help you, too.

#1 Pay attention to how your clothes are fitting.

Some of us just get so caught up in our lives that we don't bother paying attention to our weight.  There are easy ways to keep track of where you are without becoming obsessive.  The writing of this post was spurred by the fact that I've recently noticed my shorts not fitting quite right.  At first I thought I must have dried them on too high a temperature and they shrank, but a visit to the bathroom scale told me otherwise.  I've gained a few pounds and now I'm going to have to make sure to lose it and keep it in control.  If I wasn't paying close attention to how my clothes were fitting, I might have let the few pounds slide and next year it'd be another few pounds, followed by another, and, well, you get the idea.


#2  Know your ideal weight and check it (somewhat) often.

I think it's important to weigh yourself to see if you are maintaining your weight, but notice I said to check it somewhat often.  You don't want to be obsessively checking the scale.  First off, weight gain fluctuates.  I can have a five pound swing in a 24-hour period due to water retention or a hefty meal.  So weighing yourself too often isn't going to do you much good.  But it's good to get in the habit of weighing yourself about twice a month.  Think of it as a check in to see where you're at.  It helps to use the same scale and always weigh yourself around the same time of day.  If the number's higher than usual, weigh yourself again the next day to see if it was one of the above-mentioned factors that contributed or true weight gain.

#3  Keep your portions in check.

This one is difficult for me because I have an appetite that matches and probably even exceeds my rock star metabolism.  But after noticing the tight shorts, this is the first thing I started focusing on.  If you need to, start using smaller plates.  The average American plate size has grown 3 inches in the past generation.  Fill up those 3 inches everyday and you'll easily add more than 3 inches to your waistline!  For me, I either have to cook less food (if it's there, I'll eat it) or put what should be the leftovers and not my second and third helpings away before we even start dinner.

#4  Evaluate your fitness routine.
   If your current workout routine is non-existent, this will be easy.  Just add some kind of exercise into your daily life and you'll be doing better.  Trust me, I know it's hard to go from not working out at all to getting into the fitness habit.  I've been there.  Figure out a way to find the time, motivation, and make it happen.  No excuses.
    This is a little trickier if you are already working out and finding it difficult to maintain your weight.  You need to look at the type of exercising you are doing, the frequency, and the intensity.
    Maybe you are doing the same type of exercise over and over and never switching it up.  Shock your body into reacting by doing something different.  If you always run on the treadmill, try swimming.  If you do the same step aerobics class every week, try a different class with a different instructor.      
   Frequency is important, as well.  Maybe your 30 minute walk a day just isn't enough.  Do you need to add just one more day of fitness into your routine?
   Another important factor is the intensity of your workouts.  Are you sitting on the stationary bike while reading the current copy of US Weekly and calling it an intense, calorie-burning workout?  If that's the level of your intensity for most workouts, that's likely the reason you are having difficulties maintaining a healthy weight.  Try to increase the difficulty of your workouts enough that you are truly pushing yourself.  Working out is not easy and you should be tired when you're finished.  Tired in a good way, of course.

#5  Add functional fitness to your day.
This one goes hand-in-hand with the tip #4, but deserves its own space. I know this is nothing new, but something most people don't bother doing.   There are countless ways that you can sneak little calorie burners into your day.  The most obvious is probably to walk more.  When I was teaching I did an American Heart Association walking program with my students where we wore a pedometer for a month.  You would be amazed at how quickly those extra steps can add up and each extra step means more calories you are burning.   So take the farthest parking spot and get some extra steps walking into the grocery store.  When you go to the doctor's office, take the stairs rather than the elevator.  Turn TV time into a time when you can sneak in a little exercise.  Why not do push-ups and sit-ups during the commercials?  Come on.  You are not too tired.  Just do it.  Do some squats, lunges, or calf raises while brushing your teeth or chopping vegetables for dinner.  If you think about it everyday, you can easily burn a hundred calories or more.  And just so you know, it only takes one hundred extra calories a day to gain those two pounds a year.  Just adding some functional fitness alone can help avoid that.

#6  Don't let yourself get too hungry. 
   This scenario happens way too often at our house:  my wonderful husband Tim comes home ravagingly starving because he didn't eat any lunch.  For dinner he eats up way more than he would normally eat (leaving me no leftovers for lunch!), scarfing his food so quickly he hardly takes time to breathe.  Just a few minutes later, he discovers that he is now so completely full that he has a stomach ache.  Sound familiar?  Skipping meals is not healthy or any way to lose weight.  In fact, not only should you not skip meals, I think it's also important to have small snacks in between meals.  You want to keep your blood sugar at an even level all day, and never be so hungry that you feel starving.  I know when I get into "I'm starving!" mode, I eat whatever I can get my hands on quickly, without too much thought to what I am eating.  So not only are we more likely to overeat when we get super hungry, we are also more likely to eat less-nutritious junk food.  I know some people like to eat five or six small meals a day. I've always thought that was too much work.  I prefer to eat the three traditional meals with small snacks in between, but both accomplish the same goal.

#7 Don't drink your calories.
  This is normally the easiest one for me.  I am a water girl and that is my main beverage throughout the day.  I've heard people complain that they need taste and can't stand just drinking water.  If that's the case for you, add some flavor naturally by adding fresh mint, fresh fruit, lemon or lime to your water.  Make a big pitcher of it and drink from it throughout the day.  If you are constantly drinking juice or soda pop, you might as well be adding an extra snack or meal to your day.  Those liquid calories add up quickly.
    Alcoholic drinks should also be considered here.  It's summer time right now.  Summa, summa, summa time.  What is it about summer that makes me want to drink cold beer?  I'm pretty sure this has contributed to my recent weight gain.  I love a nice bottle of cold Blue Moon, and the fact that it's summer makes it seem like I have a free pass.  Now I'm not saying you can't drink at all if you want to maintain your weight.  It's just good to have an understanding of how much you can drink without packing on the pounds.

#8 Stick to whole foods. 
  We live in a world where everyone is looking for convenience in their food.  They don't want to have to take the time to do anything other than open a package and shove the food in their mouth.  Well, I'm telling you that not only is that the fastest way to get a snack, it's also the fastest way to become a part of the statistics I mentioned at the beginning of this post.  If you have a policy of sticking to mostly whole foods and eliminating processed food, you will be not only eating more healthily, you will most likely eat less.  Think about it.  You're a little hungry and think you might want a snack.  If you had a box of Pop-Tarts in the pantry and it'd be super easy to take one out and eat it.  But, since you are following the whole foods policy, you don't have anything that fast or convenient.  If you want a snack, you have to chop some vegetables or put ingredients together to make something.  You decide you aren't that hungry after all.  See?  You'll be less likely to eat when you don't really want to or need to but just do because it's convenient to do so.
   All that stuff I mentioned above is probably enough to convince you that sticking to whole foods is a better idea than relying on processed crap, but wait! There's more.  I just happened to come across this article today that was linked on one of the blogs I like to read, Summer Tomato.  It talks about a recent study that has found that calorie-for-calorie, processed food will make you gain weight faster than whole foods.  Seriously.  I guess all calories aren't created equal after all.

So there you have it.  My 8 little tips for helping curb that long-term weight gain that seems to creep up on us when we are too busy living our lives.  Our society has made it seem like weight gain is some inevitable truth that comes with age.  You get old and you get fat.  No thanks.  I'll chose the path less traveled, my friends.  I hope you do, too.

Thursday, July 22, 2010

Another Quinoa Side Dish

      I've been on a bit of a quinoa kick lately.  You can't get too much of a good thing, right?  Quinoa is a versatile and delicious whole grain; I especially love it because it's a great protein source.  That's the first question people ask when they learn I limit my animal products:  But where do you get your protein?  As if animal foods are the only foods on the planet to provide protein.  Trust me, if you eat a variety of whole grains, nuts, seeds, beans, and legumes, you will probably easily get more protein than you need. But I digress.  Here's  a simple little quinoa side dish that can compliment a variety of meals.  Think of the meals you'd usually have a rice side dish and swap in this one.  It's tasty, filling, and relatively easy to make.

Quinoa Chickpea Pilaf
adapted from Veganomicon


2 tablespoons coconut oil
1 small yellow onion, chopped finely
2 cloves garlic, minced
1/2 teaspoon ground cumin
1 1/2 teaspoons  ground coriander
freshly ground black pepper, to taste
1/2 teaspoon salt
1 tablespoon tomato paste
1 cup quinoa
2 cups cooked or 1 (15 ounce) can chickpeas, drained and rinsed
2 cups vegetable broth

Step 1:  In a small stockpot over medium heat, let the coconut oil melt.  Add the onions and saute for about 7 minutes.  Add the garlic and saute for 2 more minutes.

Step 2:  Add the tomato paste, coriander, cumin, black pepper, and salt and saute for another minute.

Step 3:  Add the quinoa to the pot and saute for 2 minutes.

Step 4:  Add the chickpeas and broth; cover and bring to a boil.  Once it is boiling, lower the heat to low, cover, and cook for about 18 minutes, stirring occasionally, or until the quinoa has absorbed all the water.  Fluff with a fork and serve.

There was plenty left over so I could have it for lunch today.  Paired with a small salad of arugula+one small sliced carrot+sliced celery+a few slices avocado+sesame seeds+sliced almonds+drizzle of balsamic vinaigrette dressing and it was an immensely satisfying lunch.

Tuesday, July 20, 2010

A Healthified Mexican Meal

     I love Mexican food, but don't make it that often because Tim is just not that big of a fan.  He says he just tolerates it, but I think he does secretly enjoy the flavors of good Mexican food.  He likes Chipotle, does that count?
    Unfortunately my favorite Mexican meals are not all that healthy--especially heavy on the cheese.  And what is it about Mexican restaurants?  The portions are gargantuan! So my mission was to create a healthy Mexican meal that kept portion sizes in check.  I've been on a Veganomicon kick lately, so I started there.  I found a tasty-sounding recipe called Mexican Millet.  Many of the ingredients I had on hand.  Good start.
   If you aren't familiar with millet, it is a healthy whole grain that actually looks a lot like quinoa.  You already know that whole grains are good for your heart, but millet is also a good source of important nutrients likes phosphorus and magnesium.  It's always good to mix it up and get a variety of whole grains in your diet--not just the standard whole wheat pasta and brown rice. You can pick it up in the grain section of most supermarkets.  Tangent over.
    After deciding on the Mexican Millet from  Veganomicon, I continued my menu planning.  There's a bean and corn salad that I often make.  The original recipe is from allrecipes.com , but it uses canned corn.  It's a shame to use canned corn when the fresh corn is ripe for the pickin'! So I decided to switch it up a bit and use fresh corn.  Usually we use this recipe as a dip for our tortilla chips, but thought it would make a scrumptious filling for some whole wheat tortillas I had in the pantry.
    The result was a stand-up-and-clap meal.  Okay, maybe it wasn't really worth standing up and cheering, but it was darn good.

Mexican Millet 
adapted from Veganomicon 


2 tablespoons coconut oil
1 clove garlic, minced
1 cup millet
1 small yellow onion, diced finely
1 jalepeno, seeded and minced
2 cups vegetable broth
3 tablespoons tomato paste
1/2 teaspoon salt
1/4 teaspoon ground cumin
2 tablespoons finely chopped cilantro
Freshly squeezed lime juice

Step 1:  Heat the oil and garlic in a medium-size, heavy-bottomed saucepan over medium heat.  Let the garlic start to sizzle, and then add the onion and jalapeno.  Stir-fry until the onion gets soft and starts to turn golden, about 6-8 minutes.

Step 2:  Add the millet, stir, and saute for 4-6 minutes, until the millet turns lightly golden.

Step 3:  Pour in the vegetable broth, tomato paste, salt, and cumin.

Step 4:  Bring the mixture to a boil, stir once, and cover.  Lower the heat to low and cook for 25-30 minutes, until the liquid is absorbed.
 
Step 5:  Once the liquid is absorbed, remove from heat and allow to sit, covered for about 10 minutes.

Step 6:  Sprinkle with the chopped cilantro and fluff the millet with a fork.  Squeeze fresh lime juice over each serving.

Sorry I have no pictures of this process.  I was stressing to get dinner ready and didn't think to stop and take pictures.  I do have a picture of the final plate--see below.

Black Bean and Fresh Corn Salad
adapted from allrecipes.com 


1/4 cup balsamic vinegar
2 tablespoons olive oil
1/2 teaspoon salt
1/2 teaspoon Sucanat (or you can use regular old refined white sugar)
1/2 teaspoon ground black pepper
1/2 teaspoon ground cumin
1/2 teaspoon chili powder
3 tablespoons chopped fresh cilantro
1 1/2 cups cooked black beans, or 1 (15 ounce) can, rinsed and drained
1 1/2 cups fresh corn, cut from the cob (I used 2 cobs.  If you don't have any fresh, go ahead and use canned sweet corn)

Step 1:  Bring a small pot of water to a boil.  ~Meanwhile~In a small bowl, whisk together the first eight ingredients.  Set aside.

Step 2:  Cut the corn from the cob.  (I used my chef's knife to do this--it's really easy)

Step 3:  Once the water is boiling, put the corn in the water and let it boil for about 2-3 minutes.  Drain and rinse with cold water.

Step 4:  In a medium bowl, stir together black beans and corn.  Toss with vinegar and oil dressing.

   This salad is best if you can make it the night before and refrigerate overnight.  If you can't do that, do it at least an hour ahead of time to give the flavors a chance to meld.  Just think, if you do it overnight, dinner will come together in a snap!  This salad is amazingly good and very versatile.  Besides the two uses I described above, it can also be used as a topping for a lettuce salad.  Be happy if you have leftovers.

   Here's the final plate.


The picture doesn't do the tortillas justice.  I used small whole wheat tortillas that I had warmed in the oven and filled them with the corn and bean salad. (I warmed up the salad in the oven as well because I wanted a warm tortilla--I'm sure it would be good cold, too)  That's it!  You could add cheese or whatever, but I don't think it's necessary.  The salad has plenty of flavor and texture.

The millet was spicy.  Now my palette is somewhat weak in the spice area, so some of you might think this dish doesn't bring much heat, but both Tim and I thought it was hot.  In a good way.  I put some on Meghan's plate, not sure if it would be too hot for her or not.  She tried a few bites and when I asked if she liked it she shook her head yes.  There were no complaints about its hotness, so I guess she handled it just fine.  She didn't eat that much of it, though.

Tim thought the meal would be better if the millet was mixed in with the corn and bean salad, so that's what he did.  I tried it for lunch today (gotta love leftovers!) and he was right.  The salad has a sweetness about it that paired nicely with the spice of the millet.
 I mixed in a little guac with my lunch.  Another great addition.  There are still leftovers in the fridge, so this recipe makes a good amount of food.  If you have a big family, you'll feed 'em all, if not you can have this for dinner a few nights in a row or have your lunches covered for a few days.  :-)

Toddler Tuesday: Thank Goodness for Smoothies

    If there is one thing I've learned about toddlers, it's that you always have to be on your toes.  Once you get comfortable and think you have things figured out, everything changes.  Meghan goes through stages where she eats a lot and then stages where she hardly eats at all.  Despite how much she is eating, I have always been able to count on her eating some sort of vegetable and fruit throughout any given day.  It may not always be as much as I would like, but I stay relaxed as long as she gets some of the good stuff in her.  She really tested my ability to stay relaxed about her eating, however,  during the end of last week.  Suddenly, without warning, Meghan started refusing just about anything plant-based.  She didn't want fruit, vegetables, or beans.  The second day after this started, this is what she ate:

breakfast:  plain yogurt (I tried to sprinkle it with a little granola and blueberries and she was NOT happy)
lunch:  cheese
dinner: butter

   I'm not kidding.  There is no exaggeration here.  For dinner, all she wanted was the butter.   She had a plate of delicious food in front of her, but she just pointed to the butter that was on the table and would not relent until that's what she got.  I tried to put it on bread for her.  Oh, no, Mommy, that is not what I meant.  I just want to stick clumps of butter in my mouth plain.  GROSS!  I will admit, at this point, I was starting to stress out.  What if this becomes a constant trend and all she wants is dairy products?
    There is one thing that she usually will not refuse: smoothies.  The next day after her all-dairy day I turned to the smoothie to help rectify the no fruit or veggie situation.  The great thing about smoothies is that you can make it super healthy and it still seems like a treat.  They are great for breakfast and Meghan also regularly eats them for snack.  They are especially nice if you need breakfast on-the-go.  When we need to get somewhere early in the morning, I make a smoothie the night before, put it in her straw sippy cup and refrigerate it, and then in the morning she gets her breakfast in the car.
    For Meghan's smoothies, I start with plain yogurt (the flavored kind has way too much sugar!), milk, and then add whatever fresh ingredients I have on hand.  Here are a few recipes if you need help getting started:


                                    ^^^Notice Meghan's empty cup in the background. :)


Mom's Emergency Super Smoothie
For when your little one isn't eating her fruits or veggies!


1/4 cup plain yogurt
1/4 milk
1 small handful fresh blueberries
3-4 strawberries
1/4 cup cubed cantaloupe
1 small handful fresh baby spinach
1 Tablespoon ground flaxseed meal
1 Tablespoon honey (preferably raw)
3-5 ice cubes

Place all ingredients in blender (I use my Magic Bullet) and blend until smooth.
This makes enough for 1 large or 2 small smoothies.  I usually fill Meghan's cup and then drink whatever is leftover.
Tip:  When using spinach in a smoothie, it's best to not put the spinach in first.  


Meghan's Favorite Smoothie 
This is Oh. So. Good.  

1/4 cup plain yogurt
        1/4-1/2 cup milk (depending on how thick you like it)
1 banana
2 heaping Tablespoons peanut butter
1 Tablespoon ground flaxseed meal 

Place all ingredients in a blender and blend until smooth.  Makes 1 large or 2 small smoothies.  Meghan likes to hog this one--she loves it!

     I am happy to report that Meghan seems to be getting back on track this week with her eating.  Today for lunch I pulled out an avocado that I knew was going to go bad if we didn't eat it up soon.  Eating avocados before they go bad is never a problem in this house, but with Meghan's fruit and veggie strike there are a few they are on the brink.  I was nervous as I cut it into chunks and served it to her, but knew my girl was back when she exclaimed, "Mmmmmm, 'cado!"  Here she is gobbling it up:


   I know the last closed-eye picture isn't great, but I wanted to show the empty tray.  She ended up eating an entire half of the avocado, and I was a happy mama.  I'm glad that I have learned that refusing a food one day doesn't mean she is never going to like it.  There are many vegetables that she refused multiple times before deciding she likes them (cauliflower and asparagus included) and it isn't uncommon for her to change her mind multiple times about liking a certain food.  The best thing you can do is continue to offer a variety of healthy foods--eventually your little one will eat (and enjoy!) the good stuff.  In the mean time, sneak it in a smoothie!  

Thursday, July 15, 2010

Blueberries for Dinner!

  
   With a whole bunch of blueberries from the farmer's market, I decided to incorporate them into a dinner this week.  My other criteria was it must be quick and easy.  Typically I try to mix in at least two super-quick dinners each week.  As much as I love to cook, time-consuming dinners every night is just too much.    So here is my quick-and-easy meal with blueberries:  Blueberry Spinach Salad with Grilled Chicken.  Very simple, yet quite delicious.  I love the strong flavor of blue cheese and think it makes this salad, but if you don't like it, swap in goat's cheese or even feta.

Blueberry Spinach Salad with Grilled Chicken


For the chicken
2 skinless, boneless chicken breast halves (preferably free-range, organic)
olive oil
apple cider vinegar
dried thyme
cayenne pepper

For the salad
5 oz.  organic baby spinach
~2-4 oz. blue cheese, crumbled
1 cup fresh blueberries
1/2 cup toasted pecans, chopped

For the dressing
1/4 cup olive oil
1/8 cup balsamic vinegar
2 teaspoons dijon mustard
1 teaspoon honey (preferably raw)
1/4 teaspoon sea salt

Step 1: In a medium shallow bowl, whisk together a few T. olive oil,  a few T. apple cider vinegar, a bunch of shakes of thyme, and a few good pinches cayenne pepper.  Don't worry about measuring, just make sure there is enough liquid to immerse the chicken.  Add the chicken and  mix everything around until it's evenly incorporated.  Cover and refrigerate as long as you have.  (30 minutes, or 8 hours!) I did about 3 hrs. If you don't have time to marinate, just season with salt, pepper, and/or whatever poultry seasoning you have.

Step 2:  Oil the grill and grill the chicken over medium-high heat until thoroughly cooked, about 5 minutes per side.

~Meanwhile~
Step 3:  Whisk together all dressing ingredients in a small bowl and set aside.

Step 4:  In a dry skillet over medium heat, toast the pecans.  Shake 'em around the pan until you start to smell them, about 5 minutes.  Remove from heat and roughly chop.

Step 5:  Remove chicken from grill and cut into 2 inch pieces.  I use poultry scissors for this.

Step 6:  In a large bowl, assemble the salad ingredients:  spinach, cheese, blueberries, pecans, and chicken.  Drizzle with the dressing and carefully toss.  Viola!  Dinner is ready.

Yield:  2 very hungry people or 4 moderately hungry people.  Tim and I ate it all.  We were starving.

Wednesday, July 14, 2010

Roasted Yellow Pepper and Corn Bisque with Corn and Edamame-Sesame Salad

   I know what you're thinking.  Soup?  In the summer?  Yes!  I was super excited to see fresh sweet corn from the local farm make its way into my beloved Dorothy Lane Market this week.  Fresh corn on the cob in the summer time conjures up memories of carefree summers on the lake and I can be brought back by eating it, even if I'm not in Northern Michigan and nowhere near a lake.  Despite my love of corn on the cob, I thought it would be interesting to find some different ways to use the fresh corn.  (We'll still be eating plenty of it on the cob, make no mistake about that.)  My search brought me to these two recipes, both from  Veganomicon.  Yep, this is a completely vegan meal.  A vegan meal that got no complaints from my meat-eating husband. (Those are hard to come by) Let me tell you, the salad was good.  Definitely worth trying.  But the soup?  The soup was to. die. for.  I love, love, LOVED this soup.  So did Tim.  Meghan thought it was just okay, but for her I think it was more of a frustration-with-trying-to-get-this-runny-soup-into-my-mouth issue.  She's only 21 months and hasn't completely mastered the art of eating soupy things.  Please try this soup.  You will be happy you did.

Roasted Yellow Pepper and Corn Bisque 
adapted from Veganomicon


4 yellow bell peppers
3 cups fresh corn, cut from the cobs (from 3-4 cobs, depending on the size)
1 tablespoon coconut oil
1 medium-size Vidalia onion, diced
3 cloves garlic
2 hot red chiles, seeded and sliced thinly
1 yellow summer squash, cut in half lengthwise and sliced thinly (about 3 cups)
3-4 cups vegetable broth (I used 4)
1 1/2 teaspoons salt
1 (14 ounce) can coconut milk (lite is fine; I used regular.  I also had a 13.5 ounce can instead of 14)
1 tablespoon pure maple syrup
Juice of one lime
good pinch nutmeg

Step 1:  Roast the peppers.  I did this during Meghan's nap time to cut down on the dinner-time crunch.  It can be done up to a day ahead.  Here's how you do it:
Pre-heat the oven to 375 degrees.  Cut the stems off and pull out the seeds.  Place them on a rimmed baking sheet, covered with parchment paper if you prefer. (Makes for easier clean up)  Bake for 40 minutes, turning them once.  The peppers should be very soft and collapsed*.  Carefully place them in a plastic bag and let them sit for about 30 minutes.  This will allow them to steam and make peeling away the skin easy.  Remove them from the bag, peel, and roughly chop.  If you aren't making the rest of the recipe now, put them in an air-tight container and refrigerate until ready to use.  
*I didn't let mine roast long enough AND I forgot to turn them during the cooking time.  I've roasted peppers before and it's never been difficult to remove the skins, but this time it was.  Make sure they are ready and you remember to turn them!  Here are my before and after pics, but remember, they weren't actually ready. :-)


And here they are in the bag:


Step 2:  Preheat a soup pot over medium-high heat.  Add the coconut oil and allow it to melt.  (Or if you are using olive oil, as I'm sure some of you are, let it heat a bit)  Saute the onion until it is soft and translucent, about 5-7 minutes.  Add your garlic and chiles and saute about another minute.  Then add your corn and squash.  Keep sauteing, about 5 more minutes, until you see the moisture coming from the squash.  

                                     
Step 3:  Add the roasted peppers, vegetable broth, and salt.  Cover the pot and bring the mixture to a boil.  Then, lower the heat and simmer, covered, for another 20 minutes.  

Step 4:  Add the coconut milk and puree the soup.  It is handy-dandy if you have an immersion blender.  I do, however, when it was time for this step I discovered the battery needed charging.  Booo!  Instead, I had to transfer to the big blender and puree in batches.  Oh, well.  

Step 5: Allow the soup to heat through again.  Add the lime juice, maple syrup, and nutmeg, stir, and it's ready to serve!  
Here's the lame picture that doesn't do it justice.  I need to work on my photography skills.  A bowl that doesn't match the color of the soup would have helped, too.  


Corn and Edamame-Sesame Salad
adapted from Veganomicon

2 tablespoons sesame oil
1 tablespoon rice vinegar
2 teaspoon low-sodium tamari or soy sauce
2 cups frozen, shelled edamame
1 cup fresh corn, cut from the cob
2 tablespoons toasted sesame seeds 

   Bring a pot of water to a boil.  While you are waiting for the water to boil, whisk together the sesame oil, rice vinegar, and tamari in a medium bowl and set aside. 
    Boil the edamame for 3 minutes, then add the corn and boil for another 2 minutes.  Drain into a colander and run under cold water.  When it is cool enough to touch, add the edamame and corn to the dressing and toss to combine.  Add the toasted sesame seeds and toss again.  (To toast sesame seeds, place in a small pan over medium heat.  Gently toss in the pan until they turn golden brown.  Watch carefully as they can go from white to burnt quickly!)  

At this point, the recipe says to chill for at least 15 minutes.  I did this, but Tim and I both agreed it would be better as a warm side dish.  We tried it this way the next night, and it was better.  Try it both ways and see what you think!  


Here is a picture of Meghan's dinner:

                                
She at all of the avocado, a little of the soup, and none of the salad.  Even though she usually loves edamame, she wouldn't try it.  Not sure if that's because it looks different in this salad form (she usually has it plain) or if she was just not in the mood.  I don't stress about these things too much.  She ate a ton of blueberries for dessert, as usual.  The girl loves her fruit.  
   

Tuesday, July 13, 2010

Toddler Tuesday: Broccoli Bites


   If your toddler or even older child is reluctant to eat her veggies, I encourage you to try these delicious nuggets.  Even though Meghan will eat plain broccoli, she eats much more when it is in this form.  I first started making these for her when she was around 10 months old; I would just cut them into small pieces.   The best thing about these yummy broccoli bites is that they are so versatile.  Your whole family will enjoy them and they are great for both meals or snacks.

Broccoli Bites
Adapted from www.homemadebabyfood.com 


1-10 ounce package organic frozen broccoli (fresh steamed broccoli may work, I have just not tried it)
1/2 cup whole grain bread crumbs*
2 whole organic eggs (if your little one is not eating egg whites yet, use 3 yolks)
1 cup shredded organic mild cheddar cheese
1/4 teaspoon garlic powder
1/2 teaspoon dried oregano
1 teaspoon dried basil
1 teaspoon kelp (optional)
1 tablespoon ground flax seed meal (optional)

Step 1:
Preheat oven to 375 degrees.  Coat a baking sheet with olive oil or spray with non-stick cooking spray and set aside.

Step 2:
Cook broccoli according to package directions and chop into small pieces.

Step 3:
In a medium bowl, whisk eggs.

Step 4:
Add remaining ingredients to bowl and mix until well incorporated.  (You may have to use your hands)

Step 5:
Shape the mixture into 1 1/2 inch nuggets and place on the baking sheet.  Cook for 20-25 minutes, flipping the nuggets over half way through the cooking time.

Serve warm.

Monday, July 12, 2010

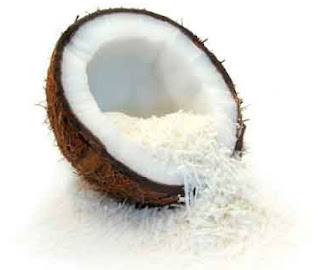
The Health Benefits of Coconut


   If you've been reading my blog and paying attention to the recipe ingredients, you have probably noticed that I use coconut oil a lot in my recipes.  I first encountered coconut oil when I bought the cookbook Skinny Bitch in the Kitch.  All of their recipes called for coconut oil.  According to the authors, they preferred to use coconut oil in recipes because "when you heat most oils at high temperatures, you change their molecular structures, [and cause] free radicals" (page 14).  I took the skinny bitch's word for it and used coconut oil in their recipes, but didn't really start substituting yet. 
   The next cookbook that I came across coconut oil was babycakes, a vegan, gluten-free, and (mostly) sugar-free book that features recipes from a New York bakery.  Here's what its author had to say about coconut oil:  "Our favored fat in the bakery, coconut oil is high in omega-3 fatty acids (these are healthy!), is packed with lauric acid, stores in your body as energy and not fat, and supports the proper function of your thyroid, thus stimulating the metabolism" (page 21).  This bit of information stimulated my curiosity and caused me to do some further research on coconut oil.  I am definitely not a scientist, but will do my best to explain the health benefits of coconut oil as I have come to understand it.  
   Back in the day coconut oil was given a bad rap because its fat content is 92% saturated fat, which as we all know has been linked to high cholesterol and heart disease.  What wasn't taken into consideration, however, was the type of fatty acid.  Most saturated fats, and all fats for that matter, are comprised of long-chain fatty acids.  The fat in coconut oil is made up of medium-chain fatty acids.  Our bodies are better able to metabolize these types of fatty acids, which is why they are used as energy more readily rather than stored as fat.  Animal studies have shown that animals with diets consisting of primarily medium-chain fatty acids (MCFA) rather than long-chain fatty acids (which are found in all animal fats) had less fat cells, smaller fat cells, and lower body weights.  
    Half of the MCFA found in coconut oil is lauric acid, which is the most essential fatty acid that helps boost our immunity.  Lauric acid is anti-viral, anti-microbal, and anti-fungul.  Talk about amazing health benefits!   The only natural sources with high concentrates of lauric acid are tropical oils and breast milk.  No one can argue the healthiness of breast milk, right?  If it's in breast milk, it's safe to assume it's good for you.  
   You can also reap the benefits of coconuts through consumption of its water or milk.  As with anything, you don't want to overdo it.  Because coconut oil and milk are high in fat, you want to make sure they replace other fats in your diet, not add more.  
    Unfortunately, there is a down side to coconut oil.  This stuff is expensive.  Good health ain't cheap, that's for sure.  When I was at the farmer's market this weekend, one of the farmers had this sign on his stand:  "Pay the farm now or the pharmacy later!"  I have embraced this philosophy for a while now.  Eating well isn't going to save me any money.  I've had to make sacrifices in other areas in my life in order to accommodate an increased budget for healthy food.  It is totally worth it for me and my family's health.  You can't put a price on that.  

Thursday, July 8, 2010

Vegetable Croquettes and Quinoa-Watermelon Salad with Citrus-Basil Vinaigrette

    How's that for a mouthful of a title?  Last night's dinner was just a vague idea in my mind that I kind of made up as I was going along.  I started with a basic kid-friendly dish that I wanted to use--a slight variation of a vegetable croquette recipe from Super Foods for Babies and Children and expanded my meal idea from there.  While visiting with my sister-in-law last weekend she told me about a watermelon salad with fresh basil she'd sampled at Whole Foods.  I thought I'd like to try to make something similar so at first that was my plan.  Then I realized we wouldn't have a protein in the meal, so thought I'd try to make the watermelon salad with quinoa and beans. It sounds like a weird combination, but it worked.  I actually had the leftover salad, cold, for lunch today, and liked it even better than I did last night.  The flavors really developed overnight and it was delicious.  It would be a great cold salad to bring on a picnic or to a potluck.
   If I ever have a meal with a lot of busy-work type prep, like chopping vegetables and such, I try to start it early so I don't have to do it all at once.  I started the croquettes while Meghan was napping so all I needed to do at dinner time was bread and saute them.
 
 Vegetable Croquettes
2 potatoes
1 small head broccoli florets
1 vidalia onion, chopped
1 clove garlic, minced
1 T. butter
1/2 cup grated carrot
1 cup shredded mild cheddar cheese
salt and freshly ground pepper
~3/4 cup Whole wheat flour, seasoned with salt and pepper, plus 3 T. wheat germ (optional)
2 eggs, lightly beaten
2 cups breadcrumbs, plus 2 T. ground flaxseed meal (optional)
coconut oil for sauteing

I love the idea of these vegetables being the basis for our main course!

Step 1:  Scrub the potatoes and cook them in a large pot of salted boiling water for 20+ minutes, until tender and ready to mash.  The original recipe calls for the potatoes to be peeled. If you feel compelled to peel your potatoes, go for it, but I see no reason to peel off the nutrients!
~Meanwhile~
Steam the broccoli for approximately 4-5 minutes, until it turns bright green.  (Don't overdo it)  Chop the steamed broccoli into small pieces.   Saute the onion and garlic in the butter for about 2 minutes. Add the carrot and continue for another minute or so.

Step 2:  Drain the potatoes, mash them, and then mix in the cheese.  Add the broccoli and onion-carrot mixture and combine.  Season with salt and pepper to taste.

Step 3:  Form into burgers.  You should have 12.  At this point, my burgers went in the fridge for later and I began making the vinaigrette.  I will continue with the croquette recipe, though, for continuity's sake.
Step 4:  Put your flour mixture, beaten eggs, and breadcrumb mixture in three separate bowls and create an assembly line.  

                                 
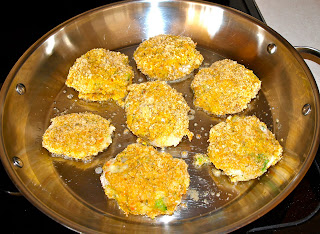
Step 5:  Coat each croquette with seasoned flour, dip in the egg, then the bread crumbs, back in the egg, and then a final coating of bread crumbs.  Saute in the coconut oil until golden brown.  

                                 
I knew we wouldn't eat all 12 of the croquettes, so I froze some of them before sauteing.  


Citrus-Basil Vinaigrette

1/4 cup extra-virgin olive oil
3 T. apple cider vinegar 
juice from 1 large orange
1/4 cup coarsely chopped fresh basil 
sea salt and freshly ground black pepper 

In a small bowl, mix together oil, vinegar, and orange juice.  Whisk until oil and vinegar emulsify.  Add basil and salt and pepper to taste.  


Set aside--you will use half for the quinoa salad and half to drizzle over the croquettes.  

Quinoa-Watermelon Salad

1 cup rinsed quinoa
1 3/4 cup water
2 cups cubed watermelon
1 1/2 cups cooked navy beans, or 1 15 oz. can, drained and rinsed
1/2 recipe of Citrus-Basil Vinaigrette dressing (see above)  
sea salt and freshly ground pepper

Bring quinoa and water to a boil. Stir once, and reduce heat to low.  Cover and cook for 20 minutes.  Remove from heat and allow quinoa to steam for an additional 10 minutes (do not remove lid).  Meanwhile, in a medium bowl, mix together watermelon and beans.  When quinoa is ready, allow to cool for a few minutes and then add it to the bowl and stir to combine.  Add 1/2 of the Citrus-Basil Vinaigrette dressing and stir to coat evenly.  Add sea salt and freshly ground black pepper to taste.  May be served warm or cold.  

I started each plate with a bed of romaine dressing, then added the croquettes and drizzled them with the remaining dressing.  I also placed the salad on top of the romaine.  Add extra dressing as desired.  


I loved all the summertime flavors in this meal.  It's a keeper!