Tuesday, August 31, 2010

Toddler Tuesday: Baked Parmesan Zucchini Coins

  Meghan likes most of her vegetables served plain, just lightly steamed.  She will eat just about all the vegetables I have offered her, but there are a few she refuses again and again.  One of her seemingly least-favorite vegetables is zucchini.  I've put some on her plate time and again as it's a vegetable I use often, but she never gets it from her fingers to her mouth.  I think it's the slimy look of zucchini (and no, I don't overcook it!).  I decided to try it a different way and see if she would give it a go.  It worked!  I just changed the look of it by baking it with some cheese/bread coating and she didn't even look twice at it--picked it right up and ate it.  And the real key: after her first bite she took another.  Next time I may add some spices (probably Italian spices) to liven it up a bit for Tim and me, but these are still good without them.

Baked Parmesan Zucchini Coins


1 medium zucchini, sliced thinly
1 egg, beaten
1/2 cup whole grain bread crumbs
1/2 cup grated parmesan cheese
1/4 cup flour (I used whole wheat)

Serves two adults and one child.

Preheat your oven to 350 degrees and lightly oil a baking sheet.

Get three small bowls and set up your station:  In one bowl, beat your egg.  In another bowl, add the flour. In the third bowl, mix the bread crumbs and cheese.

First, dip a coin in the egg and turn it to coat it on all sides.  Then, coat it with flour.  Follow this by another dip in the egg bowl, and finish with a coating of the bread/cheese mixture.  Place on the tray and continue until you have all your coins coated.  It's helpful to have a paper towel nearby as your hands will get sticky.
Bake for 20 minutes and allow to cool before serving.
The cheese and bread made a nice, crisp coating, but not too crisp that it was difficult for Meghan to eat.  These were really good plain, but think they would be great with a tomato dipping sauce.  For Meghan, I cut the coin into quarters so they would be in bite-sized pieces for her.  The adults ate them whole.     

If you make these with some added spices, let me know how they turn out!  I'm happy to have another vegetable option for Meghan in my repertoire.   

Monday, August 30, 2010

If You Think You Don't Like Tofu, Try This

   There was a time when the thought of preparing tofu at home intimidated me.  I would use it as a stand-in for cheese in casserole dishes or lasagna, but that was about it.  I've enjoyed some tofu dishes at restaurants, but have always shied away from making a meal with tofu as the main ingredient.  Then I tried Sweet Chili Lime Tofu from Vegan Yum Yum.   This has become a staple meal at our house--Tim actually gets excited when he knows I'm going to make it.  And it's easy.  So incredibly easy.  Totally takes the intimidation factor out of cooking with tofu.  The last time I made this, I made a modified version for Meghan, as the regular dish is rather spicy and I wasn't sure if it'd be too hot for her.  I have changed the original recipe just a bit to make it a little healthier.

Sweet Chili Lime Tofu
Adapted from Vegan Yum Yum


3/4 cup quinoa
zest from one lime, divided
1 cinnamon stick
1/4 teaspoon salt
1 1/3 cups water
1 14-ounce block of extra-firm tofu
1 bunch kale, washed, deveined, and cut into bite-sized pieces
2-3 tablespoons water
1 teaspoon lime juice
1 pinch salt

for the sauce
3 tablespoons agave nectar (or sugar)
3 tablespoons reduced-sodium tamari (or soy sauce)
1 3/4 tablespoons fresh lime juice
1/2 zest of the lime
1/2 teaspoon red chili flakes
1 clove garlic, minced
1/4 teaspoon salt
4 mint leaves, chiffonade (stack the leaves, roll them up, and slice thinly)

Combine the quinoa, lime zest, cinnamon, salt and water in a pot with a tight-fitting lid.  Bring to a boil.  Once boiling, reduce the heat to low, cover, and allow to cook for 20 minutes.  After 20 minutes, turn off the heat, but don't open the lid.  Allow to steam for 10 minutes before serving.

Prepare the sweet chili lime sauce by whisking together all the sauce ingredients.  I divided the ingredients and made a smaller, separate bowl of all the ingredients except the red chili flakes for Meghan.  


Drain the tofu and cut it into small triangles.  Thin, small slices work best for the dry frying method you will be using.  In order to dry fry the tofu, you need a pan that the tofu won't stick to without using any oil.  You can use either a well-seasoned cast-iron skillet or a non-stick skillet.  I don't have a big enough non-stick skillet, so I had to do mine in batches.  I also used a separate pan for Meghan's.         


Heat your pan over medium heat.  Spread the tofu out in one layer.  Use a spatula to press the tofu carefully.  As you gently squeeze the liquid from the tofu, it will start to turn golden brown.  Be gentle as to not break the tofu pieces and try to squeeze as much liquid out as possible, as this will make for firmer pieces.  

After several minutes, gently flip the tofu over and continue frying on the other side.  After about 10 minutes of frying time, Add the chili lime sauce and stir to coat the tofu.  Turn off the heat and allow the sauce to bubble up, reduce, and form a glaze.  (If this doesn't happen, turn your heat back up, your pan isn't hot enough)  
Meanwhile, put your kale in a wok or large skillet with the water, lime juice, and salt.  Cover and cook them over high heat 3-4 minutes until the greens are steamed and tender.  
To serve, place the kale on your plate, top with quinoa and tofu.  Drizzle any leftover sauce over the top of everything.  

Meghan's plate looked a little different, as she likes her food separate. 
Her meal also included raw red bell peppers and some cheese.  I didn't give her any of the cooked kale.  I'm pretty sure it would be way too slimy for her--she's a big texture girl.  Anything that is too mushy or slimy and she won't even pick it up without making a face.  

I was hoping to be ready to transfer to my new site by now, but life has been so hectic that I'm just not there yet.  After this weekend (when we are traveling again), things should settle down and I hope to be able to focus on my blogging more.  I'll keep you updated as to when the move it going to happen.  

On another note, I read a really interesting article today about genetically modified organisms (GMOs) that I'd like to share.  It's scary how much these types of foods can show up in what we eat without us even knowing it!  Check it out here.  Make sure to scroll to the bottom of the article and get the Non-GMO shopping guide.  I printed it out; it's a great resource.    

Tuesday, August 24, 2010

I'm Still Here

Hi there blog friends! I'm just checking in to give reassurance that I have not disappeared on you.  This has been a busy, travel-filled summer (which I love!) and I'm not quite a mobile-blogger yet.  After a wonderful weekend in San Diego, I am now in Phoenix visiting one of my besties and her brand new baby boy.  I definitely chose the right time for my first trip back to Phoenix after moving last summer.  Yesterday was 115 degrees and did not make me miss the desert at all.  I will be back "home" in Ohio (ummm...is Ohio really my home?  Yikes. Sorry Buckeye fans, I still can't believe I live in Ohio)  tonight and hopefully posting some healthy-food thoughts within another day or so.  Thanks for hanging with me during my temporary blogging lapses. 

Tuesday, August 17, 2010

Toddler Tuesday: Don't Give Up...

 ...on foods you don't think your toddler likes.  It's been a gratifying week.  Toddlers have weird taste buds and weird moods to go along with those strange taste buds, but you never know what they will fancy one day to the next.  So even if you think your little one definitely will not like, or has even refused more than once, a certain food, don't give up--keep offering.  Meghan ate devoured two different foods this week that I didn't think she'd ever really love.

   My general rule with any meal is that I always offer something I know Meghan will like--for her it's cheese or fruit--so that I know she's not going to go hungry because she doesn't like what I'm offering.   There will be something for her to eat that she almost always enjoys.   The rest of her meal may consist of something she occasionally likes and occasionally refuses, and then something she has always refused, or something new.  I don't give up on offering the foods she has previously refused.
   Another strategy I have is to offer the same food in a different way.  Sometimes something as little as cutting a food differently will make a big difference.  For example, sometimes I'll cut a sandwich into little fingers, like this:
Other times I cut them into little squares like this:
 Pictured is one of Meghan's favorite sandwich combos:  mashed avocado+nutritional yeast.  Yum!
     This week I was reminded that these are two good strategies when Meghan happily ate a whole bowl of oatmeal and asked for seconds.  Even though Meghan rarely eats oatmeal, I have continued to offer it to her on occasion.  She will usually only eat a few bites.  Continuing to offer it to her (it's familiar)+a new cooking method=a new food Meghan loves!  

     I switched it up a little when I discovered an interesting oatmeal recipe on the blog Kath Eats Real Food.  I eat oatmeal for breakfast almost everyday.  I usually just microwave old fashioned oats, add some fruit and cinnamon, and call it a day. (No wonder Meghan didn't like it!)  This recipe calls for whipping sliced bananas in the oatmeal you cook on the stove.  The result is a wonderfully light, creamy texture.  Love it.  So does Meghan.  I basically followed Kath's recipe, but just added some cinnamon in at the end.  (Did you know cinnamon helps regulate your blood sugar?  Gotta have cinnamon in my oats!) Here's what I did:

Whipped Banana Oatmeal
Adapted from KathEats.com  

1/3 cup old-fashioned oats
1/3 cup soy milk
1/2 banana, thinly sliced
1 tablespoon chia seeds 
1/2 tsp vanilla
1 teaspoon cinnamon

Combine the oats, milk, chia seeds, and very thinly sliced banana in a sauce pan over medium heat.  Let it sit for a bit until it starts to steam or bubble, then vigorously stir to whip the bananas into the oats.  Keep stirring until it reached the desired consistency.  When it is the consistency you like, stir in the vanilla and cinnamon and serve.  You can top with whatever you like or eat it alone.  The whole process takes less than five minutes from start to finish!  Here's my little one enjoying her whipped oatmeal:
Notice the bowl of strawberries?  I always offer something I know she'll like!

The second surprise this week came when we were eating dinner.  I made a side of kale chips for Tim and me, but didn't put any on Meghan's plate.  I just assumed she wouldn't touch the kale and having it on her plate might even make her mad.  Once I started eating mine, however, she looked over at me and said, "Chips! Chips!"  She heard the crunch and assumed it was a chip.  You know, a real chip. (Meghan loves crunchy things; whenever we have tortilla chips she insists on eating them, too.)  Then she said, "Meghan chip! Meghan chip!"  I shrugged my shoulders and handed over a kale chip, thinking she would probably spit it out.  Not sure why I assumed this; kale chips are delicious and she doesn't have any set notions about green things being bad.  Once she had one, she couldn't stop.  She wanted more, more, more.  She ate all I had on my plate and then still wanted more.  Huh.  Who would have thought?  
That got me thinking.  Why did I just assume she wouldn't like kale? Because I wouldn't have touched it before the age of 25?  Maybe I would have liked it, too, if someone would have offered it to me at a young age.  So I decided to go ahead and take the kale plunge.  I added it to her beloved smoothie repertoire.  I mixed it in with her favorite combo of banana+peanut butter.  I have tried it twice so far.  The first time, she drank the entire smoothie and asked for more.  The second time, I got really ambitious.  I added more kale.  I filled up the entire Magic Bullet cup.    
                                          
Meghan helped mix it up. 
With double the amount of kale, Meghan still liked it.  She drank almost her whole smoothie, but I could tell it wasn't her favorite.  She didn't ask for more. I'll probably stick with the smaller amount of kale in the future.  Here's the original recipe (approximations, I didn't measure):

Kale Smoothie 
1/4 cup milk
1/4 cup plain yogurt
one large handful kale (deveined and torn into small pieces) Filled up about 1/2 the Magic Bullet cup
1-2 tablespoons peanut butter
1 banana
1 tablespoon ground flaxseed meal (optional)  
4 ice cubes  

Mix kale and milk in blender until the kale is broken down and you have a green mixture.  
Add the rest of the ingredients and mix until smooth.  Enjoy!


Sunday, August 15, 2010

Change is in the Air

    Howdy blog readers!  This post isn't going to have any healthy eating tips, ingredient information, or recipes.  I just wanted to share some exciting news--my food blog is going to be moving.  I've decided to leave blogger and use a self-hosted site.  I had to change the name because ourdailybread.com was not an available url.  I don't want to tell you the new name just yet because the new site is actually already live, but is definitely not ready to be seen yet. :-)  My non-tech-savvy self is learning as I go, but I'm hoping the new site will be up and ready to go by next week.  I'm trying to figure out how to export everything I've got on this blog to the new site; cross your fingers that none of my content is lost in the process!  I will keep you updated on my progress and hope that you'll follow me to my new site and continue reading.  There will still be a few posts here before the move, so keep checking back for new recipes.

Friday, August 13, 2010

Zucchini 3 Ways

    Zucchini is in abundance at the farmer's market right now, and if you are lucky enough to have your own garden, you may be overflowing with summer squash right now.  Looking for some different ways to use up your abundance?  Read on for three different recipes where zucchini is the star.  That's right, folks--one post with three recipes!  Each recipe is tasty and showcases zucchini's versatility, so even if you don't have your own garden, it's worth buying some extra to give the recipes a try.  

Zucchini and Gruyere Grilled Quesadillas 


2 zucchini squash, sliced
1-2 tablespoons olive oil+more for brushing tortillas
sea salt
freshly ground black pepper
8 whole grain tortillas*
dijon mustard
1/2-1 cup shredded gruyere cheese**

*I used these whole grain tortillas from Trader Joe's


**TJ's has great prices on blocks of gruyere cheese.  Much cheaper than I've seen anywhere else!


Slice your zucchini into medium sized coins.
Heat the olive oil in a large skillet over medium heat.  Add the zucchini and sprinkle with sea salt and freshly ground black pepper.  Stir the zucchini around to coat it with the oil, salt, and pepper.  

                                        
Saute the zucchini until it is tender and starting to brown, 8-10 minutes.  Remove from heat. 

                                          
Brush one side of a tortilla with olive oil and place it on a plate.  Add about a teaspoon or so of dijon mustard to the other side and spread it around. 
                                            
Cover the tortilla with a layer of zucchini coins, then a layer of the gruyere cheese.  Put another tortilla on the top and brush the top with olive oil.  Continue the process with the rest of the tortillas, stacking them on top of each other on the plate.  
                                           
Carefully transfer each quesadilla to the grill (medium heat).  Grill for 3-4 minutes, until the tortillas starts to brown, and then use a large spatula to carefully flip each quesadilla.  Grill for an additional 3-4 minutes.  Cut each quesadilla into 4 wedges and serve.  Serves 4.  
Serving size:  4 wedges.  

These were very tasty and the leftovers were actually great for lunch the next day.  

Zucchini Gratin
2 zucchini squash
1 yellow squash
1 tablespoon coconut oil
1/2 cup freshly grated parmesan cheese
1/2 cup whole wheat bread crumbs
1/2 cup coarsely chopped fresh basil leaves

Preheat the oven to 350 degrees.
Slice your squash into 1/4-inch thick coins.  Place on a baking sheet or wire racks and lightly salt.  Allow to sit for 30 minutes.  Don't skip this step.  This will prevent your gratin from being soggy.


Thoroughly rinse and dry the squash.  Heat the oil in a large skillet and saute the zucchini until it starts to brown, 8-10 minutes.  In a small casserole bowl (sprayed with oil), cover the bottom with a layer of squash.  (It's okay if the squash overlaps some.)


Top with a layer of breadcrumbs, cheese, and basil.     
                                      
Continue layering the squash, breadcrumbs, cheese and basil.  Top with a little extra cheese.  Cover with oil and bake for 10 minutes.  Remove the foil and bake an additional 20 minutes until the top is brown and bubbly.  Makes 4 simply delicious servings.  


Yum!  We accidently ate all 4 servings.  (In case you don't know--there are only 2 1/2 of us.  1 woman+1 man+1 toddler)  


Summer Vegetable and Quinoa Skillet


1 1/2 cups quinoa
2 3/4 cups vegetable stock
olive oil
1 zucchini squash, sliced and then quartered
1 yellow squash, sliced and then quartered
1 cup cooked corn (fresh or frozen)
2 tablespoons fresh minced parsley
1/8 cup coarsely chopped fresh basil
juice of one small lemon
1/2 cup sliced almonds, toasted
sea salt, to taste
freshly ground black pepper, to taste
lemon zest

Heat a few swirls of olive oil in a large skillet.  Add your squash to the skillet and saute until it starts to get tender, about 5 minutes.

Add the quinoa and stir.  Add the vegetable stock and bring to a boil.  Once boiling, lower the heat to medium low and cover.  Allow to simmer until the liquid is absorbed, about 20 minutes. 

~This is a good time to cook your corn if it isn't already (I used the microwave because I only had frozen corn available), toast your almonds (just use a small pan and dry toast them over medium heat), and prepare your parsley and basil. ~

Once the quinoa is ready, remove the cover and stir in the lemon juice, parsley, basil, and almonds.  Taste and add salt and pepper to your liking.  Top each serving with a some lemon zest.  I'm not sure how many servings this makes--we ate about 1/2 of it and the left overs are still in the fridge.  Tim really liked this dish and made sure to tell me he wanted me to make it again. I have a tendency to make something he likes and then forget about it and never make it again.  What can I say?  I like trying new things. :-)  

I served this dish with roasted cauliflower.  Who knew cauliflower could be so good?  
Sure, zucchini is available all year round. But why not take advantage of the time when it is its freshest and most abundant?


Thursday, August 12, 2010

Coconut Curry Vegetable Wrap

   Every time I go to P.F. Chang's, I get the same thing:  the coconut curry vegetables.  We actually stopped there last Sunday on our drive home, but I couldn't really enjoy my dinner as Meghan was at the end of her rope by this point (we'd been driving in the car ALL DAY).  Since then, the flavors have been lingering, tempting me to visit the local Chang's establishment to get another coconut curry fix. Instead, I decided to try to recreate the flavors in my kitchen.  I switched things up a bit and went for a lunch dish.  The dish at P.F. Chang's is a medley of cooked vegetables and stir-fried tofu in a delicious coconut milk based curry sauce.  I wanted raw veggies for my lunch, so I thought of a wrap.   I think this is a great way for me to satisfy my Chang's cravings and can save us a ton of $$!

Coconut Curry Vegetable Wrap 


1/4 large cucumber, sliced and then quartered
1/2 medium red bell pepper, cut into small squares
7 baby carrots, sliced
romaine lettuce
1/4 cup whole cashews
1/4 cup unsweetened coconut milk
1 tsp. reduced sodium tamari
1 tsp. fresh lemon juice
1/8 tsp. ground celery seed
1/8 tsp. ground cumin
1/4 tsp. mild curry powder
sea salt and freshly ground black pepper, to taste
2 whole grain tortillas (I used Smart & Delicious Low Carb High Fiber tortillas)


Prepare your vegetables and place them in a medium bowl.  Set aside.
In a small bowl, mix together the coconut milk, tamari, lemon juice, celery seed, cumin, and curry.  Add sea salt and freshly ground black pepper to taste.  Drizzle the sauce over the vegetables and stir until all the veggies are coated.  Stir in the cashews.  
Place two pieces of the romaine lettuce on a tortilla.  
Top with half of the vegetable mixture.  
Roll the wrap and cut in half.  If you have a lunch buddy, repeat the process with the second tortilla.  Or, if you are like me, put the other half of the mixture in the fridge and you have a quick lunch ready for tomorrow!  

I know what some of you are thinking.  I can't eat something with coconut milk and cashews--too many calories!  Too much fat!  You know who you are.  Please stop.  Let me remind you that our bodies need fat.  And the fat that comes from plant sources is the good kind.  Yes, coconut milk and cashews are calorie-dense foods.  But paired with low-calorie vegetables,  you have a perfectly balanced lunch.  For the curious, I punched this recipe into my handy-dandy Mac Gourmet program and got the following nutritional profile:

Serving size:  One wrap

Calories:  242
Fat:  17 grams
Carbs:  16 grams
Sugars:  5 grams  
Protein:  7 grams
Fiber:  14 grams  
Sodium:  202 mg 


For dessert I had three slices of watermelon.  Mmmmm--a perfect lunch!  

Tuesday, August 10, 2010

Toddler Tuesday: Healthy Snackin' Ideas

   We're back!  I was hoping to post a few times while we were away last week, but was only able to squeeze in blogging on one day.  Of course it was Toddler Tuesday. :-)  We got back home yesterday afternoon and life has been hectic since then, but I'm anxious to get back into the swing of things.
    On my mind today is healthy toddler snacks.  It is oh so easy to fall into the trap of the never-ending variety of convenient processed food for your toddler's snacks. I'll admit that even me, as health-conscience as I am, have at times fallen for the ploy.  It's just so darn easy to buy those little snackers, or whatever they are called, and pop open the top and  wow! snack time is so easy.  What mom doesn't want a little bit of easy in her life?  
     
    Here's the thing.  Those large companies (you know the ones) have massive marketing budgets that allow smart bad guys to create ads that suck parents in.  They make you actually believe that what you are feeding your little one is "healthy".  The vast majority of the snacks you can buy in the center aisles of your grocery store are not healthy, though, my friends, not healthy at all.  
    
    For starters, I'm hard pressed to find one that doesn't have sugar as a top ingredient.  I have a real problem with serving my toddler (or even infant--many of these foods are targeted at the under-1 crowd) foods that has refined white sugar as a star ingredient.  Do I need to get into the problems with feeding our little ones sugar?  Maybe that's another post. 
  
    In addition to the sugar, processed snack foods are full of weird chemicals that need to be added to keep the food "fresh", the right texture, an appealing color, etc.  Many of these chemicals are dangerous.  Why are they allowed in food, you ask?  Isn't that what the FDA is for?  Again, the topic of another post.

   It has been shown that when we eat a lot of processed foods, our taste buds are changed and become accustomed to the strong flavors, making whole foods seem bland.  People who eat a lot of processed foods tend to need to add more salt and sugar to whole, real foods.  This is not something I want to happen to my daughter.  I want her to grow up with a taste for real, whole foods, and be able to appreciate their flavors.
  
   So even though I'm far from perfect in this area, my goal has been to avoid processed foods as much as possible.  Snacking is the most difficult area for me.  Breakfast, lunch, and dinner are a breeze as I'm usually home and can whip something up that is not processed.  We often need to eat our snacks on the go, however, and this is why I've often fallen into the processed food trap.  It's just so easy and convenient to throw some Cheerios in a snack trap and head out the door.  It's just a matter of having healthy, homemade snacks on hand as much as possible.  When it's a priority, it gets done.  It isn't always easy, but I strive to make time for it.

  Here are my ideas for healthy snack alternatives  to the standard processed snack food:

1.  Organic cheese
Meghan loves cheese, and it's a good source of important nutrients like calcium, protein, and fat.  Be careful, though, as not all cheeses are created equal.  You can buy something that you may think is cheese, but is really something else.  If the cheese you are buying says "processed cheese product" or something similar, it's time to switch.  I think organic is important because I don't want my little one eating cheese that is made from a cow whose milk is tainted with antibiotics, steroids, hormones, and the pesticides that laced the food she ate.  An added bonus is that organic cheese tastes much better than non-organic.

2.  Fresh fruit
This one seems pretty obvious, but maybe it's not judging by the massive amounts of processed snacks available to parents today.  The industry is doing quite well.  I often add nut butter to apples or bananas for Meghan's snack to add a protein.  Or she'll have a bit of cheese and a few strawberries.  I try to allows add some fat and/or protein to whatever fruit I am serving so it is a more balanced snack.

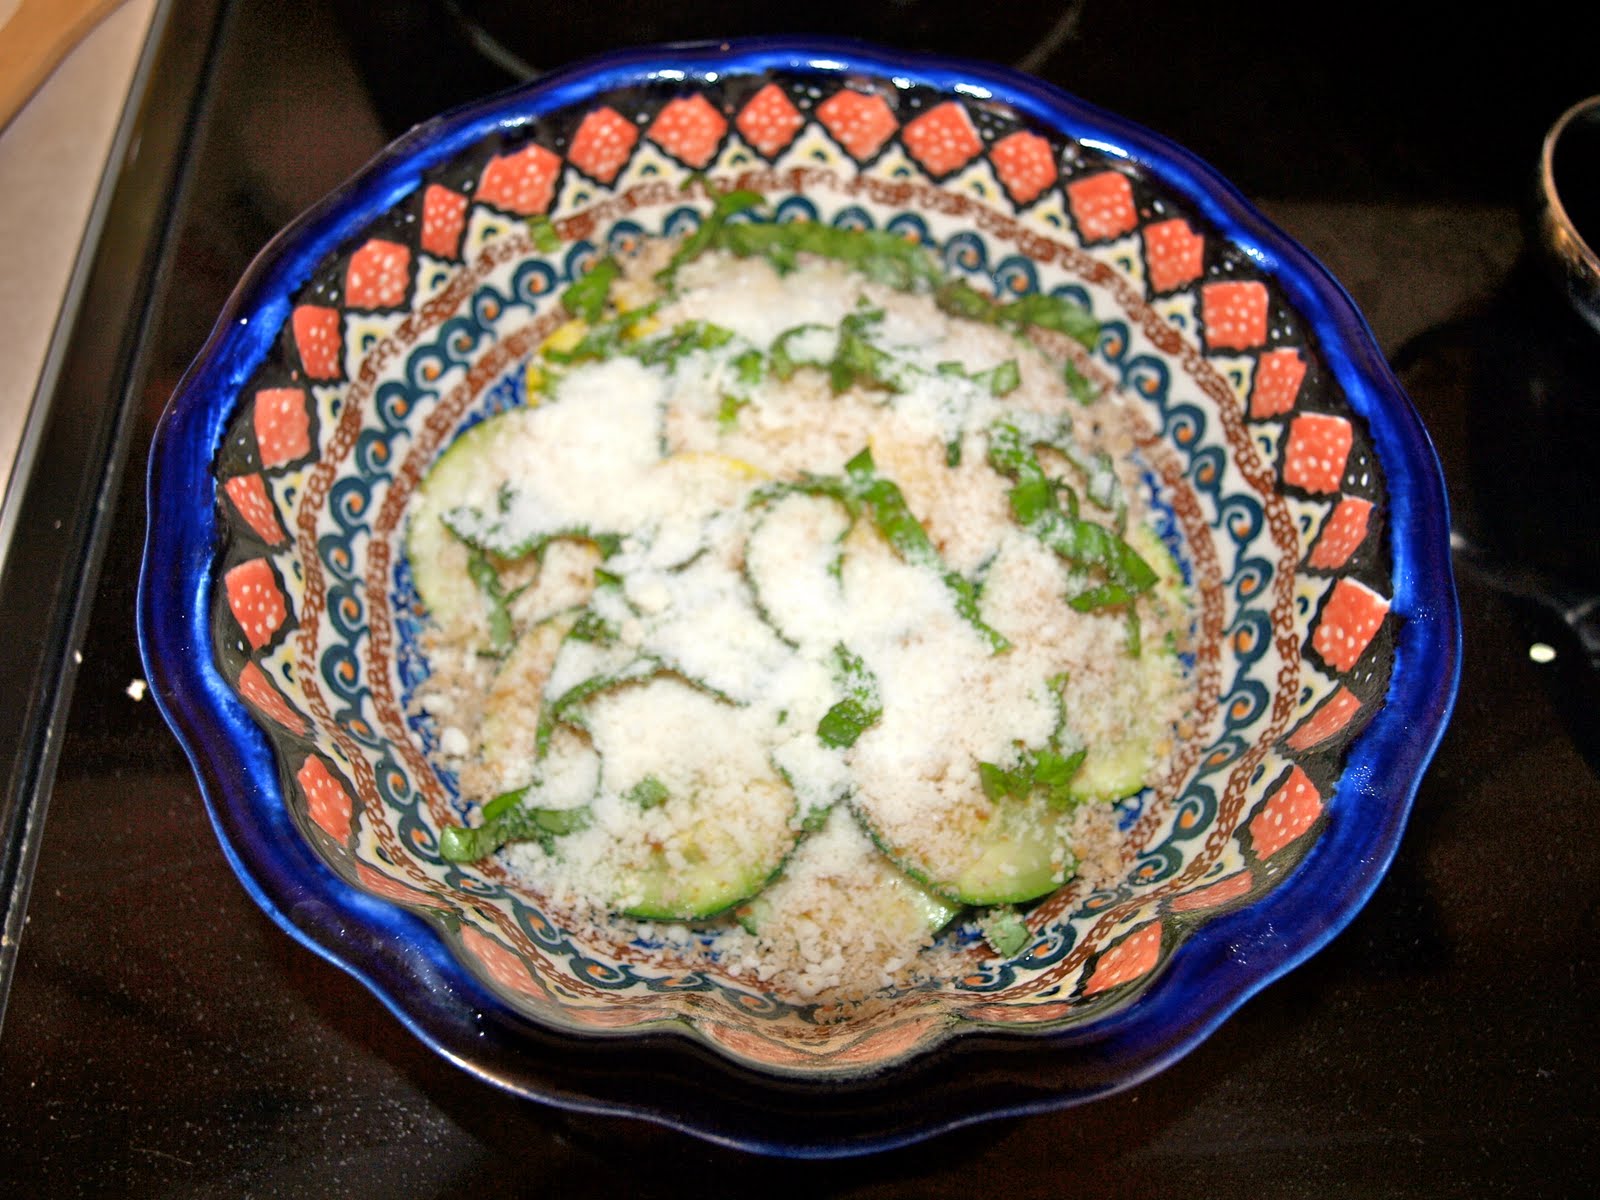
3.  Fresh Vegetables with a favorite dipping sauce 
If your little one can't eat raw veggies yet, they can be lightly steamed.  Meghan likes just about any and every dipping sauce I've given her.  She has a thing with dips and sauces--my big problem right now is getting her to eat the dipper and not just suck off the dip!  Most toddlers will enjoy fresh veggies if they are accompanied with a delicious dip.  These can be so simple and easy to make--most that I make take 5 minutes.  One of Meghan's favorite dips is equal parts peanut butter, tahini, and milk.  It's great with just about any vegetable.  My Yogurt-Thyme dipping sauce is another good one.

4.  Dried fruit 
Meghan loves raisins, cranberries, apricots, and even prunes.  Dried fruits are nice because they can be travel easily.  Just be careful as dried fruits are so concentrated that the sugar content is higher than regular fruit.  You definitely want to add something to this snack to balance that sugar.

5.  Homemade bars
Rather than store-bought granola bars, that usually have unwanted ingredients (like the dreaded high-fructose corn syrup!), make some at home.  Try these fruity snack bars, or my Cinnamon Granola Balls (recipe below).  These are another great on-the-go snack.  It just takes a little planning ahead, but it's totally worth the extra time and effort (and they are actually quite easy to make!).

Cinnamon Granola Balls


1/2 cup natural peanut butter
1/4 honey
1 cup 5-grain cereal (or substitute old fashioned oats)
1/4 cup slivered almonds, crushed
1/4 cup finely shredded unsweetened coconut (not pictured)
1/4 cup dried cranberries
2 tablespoons melted butter (not pictured)
1 tablespoon cinnamon

Preheat the oven to 350 degrees.  In a small saucepan, combine the peanut butter and honey.  Slowly heat over low until the peanut butter and honey are somewhat melty.

Meanwhile, in a medium bowl, combine the cereal, almonds, coconut, and cranberries.

Use a rubber spatula to spoon all of the peanut butter mixture on top of the dry mixture.  Use your hands to combine the dry and wet ingredients.  Warning:  this is very sticky!!  Continue to mix until it is well combined and the mixture is sticking together.

In a small bowl, combine the melted butter and cinnamon.  Line a baking sheet with parchment paper (for easy clean up).  Roll your mixture into small balls, dip them into the butter and cinnamon mixture, and place on the parchment-lined baking sheet.


Bake for 15 minutes in the preheated oven.  Makes 20 balls.  Warning:  these are highly addictive!


6. Plain beans
Why not?  One day I was in desperate need of a trip to the grocery store, but it was snack time.  All I could find to give her was beans.  She loves beans (most of the time), but it'd never occurred to me to give it to her for a snack.  What a great, nutritious snack!  Beans are full of protein, fiber, and a multitude of other nutrients.  Sure, you could jazz it up and make some cool bean salad, but Meghan prefers plain beans.
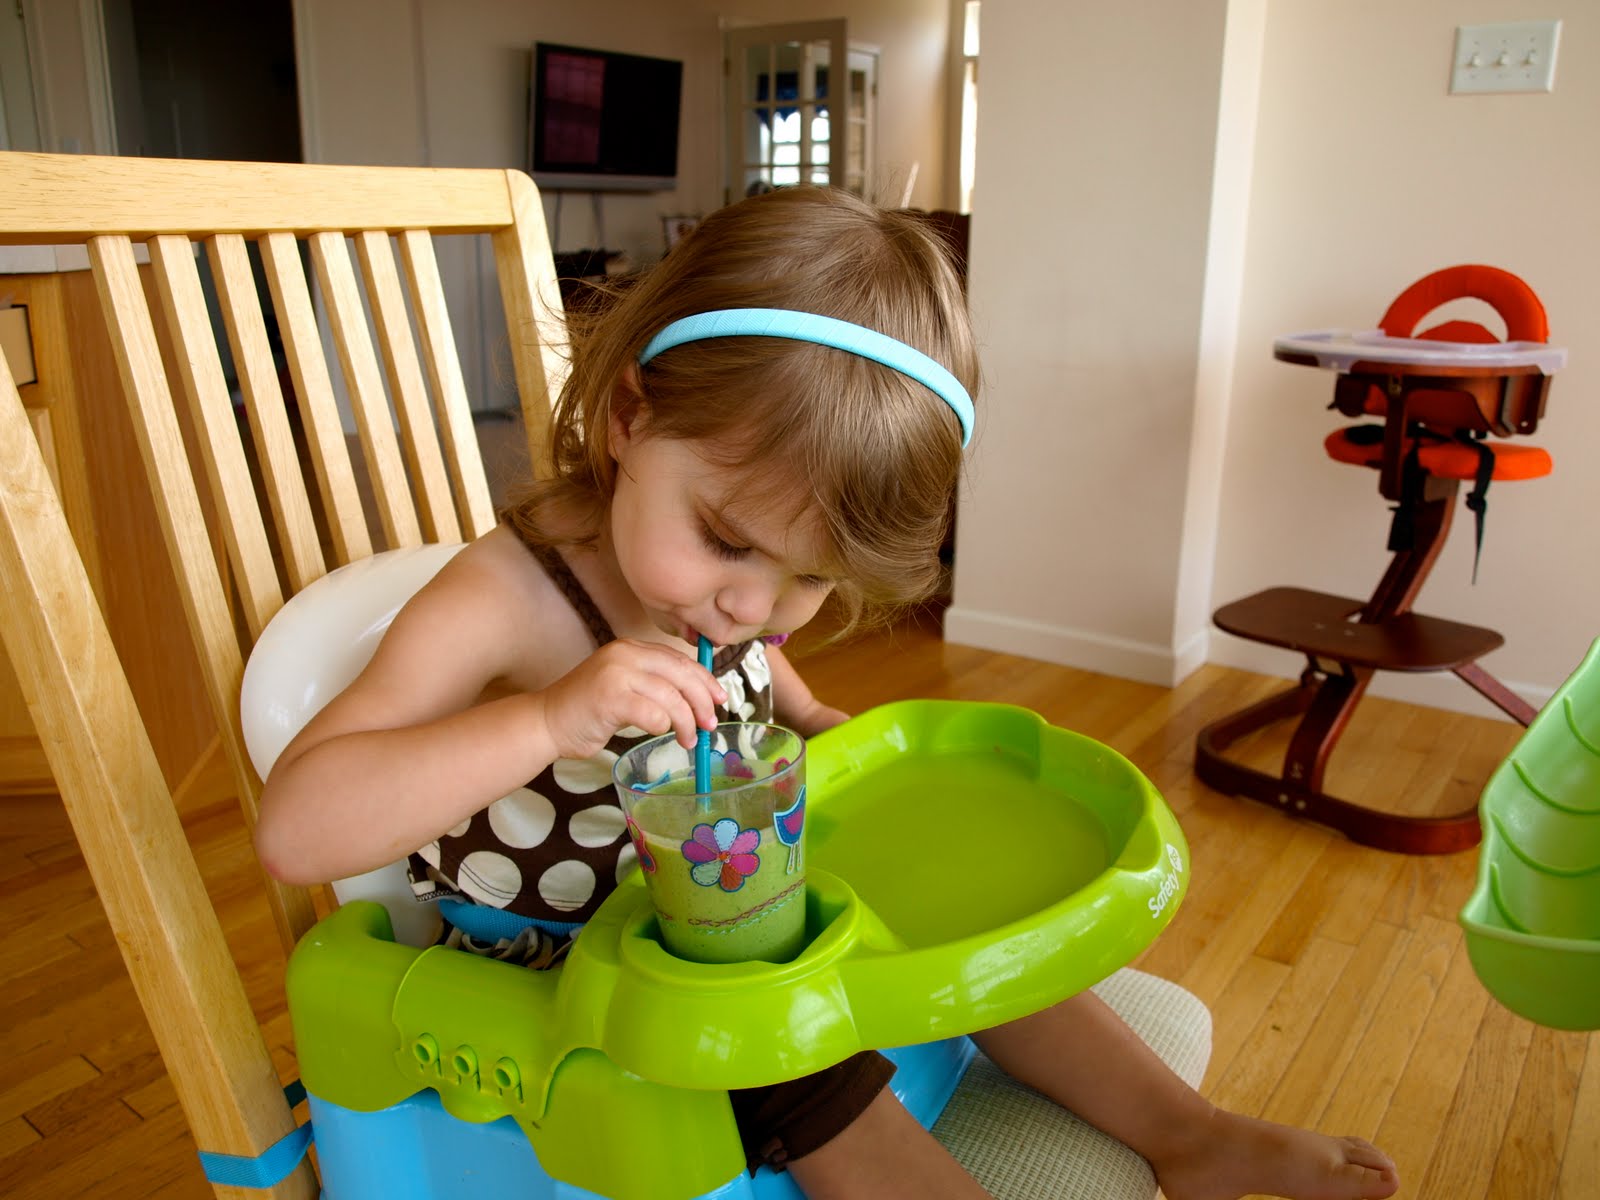
7.  Smoothies
Smoothies are the go-to snack of choice around here these days.  Meghan asks for them daily, quipping "Meghan's smoothie!  Meghan's smoothie!".  I devoted a whole post to smoothies, so I won't go into too much detail here, but I will give you a new recipe that I tried today and we both loved.  (sorry, no pics)

Raspberry-Avocado Smoothie
1/4 cup plain organic yogurt
1/4 cup unsweetened coconut milk
1/2 cup organic raspberries (we used fresh, but frozen would work)
1/4 of a whole avocado
1 Tablespoon ground flaxseed meal
1 Tablespoon raw honey
4-5 ice cubes

Place all ingredients in blender and mix until smooth.

8.  Carefully-selected convenience food


I know it isn't realistic to think I can have 100% of Meghan's foods be from unprocessed, whole foods.  I try to be selective when I am choosing convenience foods for her for those times when it can't be avoided.  The guidelines I use when scanning the ingredients and checking out the package:
*Look for whole grains-- For example, if you are going to buy crackers and such look for the types that are made with whole wheat flour, not just wheat flour, which is NOT a whole grain.
*Look for items with the fewest ingredients possible.  5 or fewer is ideal.
*Look for ingredients you KNOW.  If you can't pronounce it, it's probably not good.
*Low or no sugar (including "evaporated cane juice", which is unprocessed sugar, but still sugar)
*Organic doesn't always = healthy.  Some products try to trick parents with this label.  Just because the sugar that went into that cookie is organic, it's still not a great snack!

My favorite convenience foods lately are these guys:
They only have ONE ingredient!  Love it! They are just dehydrated veggies (they sell fruit too, but I only get the veggies--too many easy ways to get plenty of fruits).  Mmmmm--crunchy goodness.  Meghan LOVES these.  So do Tim and I.  The problem?  These buggers are expensive ($4.50 a pop!) and it's sooooo easy to eat them up quickly.  I think I need to invest in a dehydrator.  Let's add that to the list of kitchen gadgets on my wish list! (Vitamix, all-purpose cooker, etc, etc....)

So as you can see, healthy snacking without processed foods doesn't have to be intimidating.  And knowing exactly what your toddler is putting into his body can help you sleep easier.

Tuesday, August 3, 2010

Toddler Tuesday: I'm in Love

    As far as almost-2-year-olds go, I guess Meghan is exhibiting normal toddler behavior when it comes to eating.  But that doesn't make it any easier.  Last night for dinner, she had a variety of foods to choose from, many that at one time or another have been her favorites:  cheese, rice, avocado, beans, and red peppers.  She ate some of the cheese and declared she was "All done".

Me:  Are you sure?
Meghan:  All done.
Me:  You don't even want to finish your cheese?
Meghan:  All done.
Me:  What about the beans?
Meghan:  ALL DONE!

   Okay, I got it.    I usually wait to offer her fruit until she's finished with all the other foods to discourage her from filling up on the fruit.  I think if she had her way she'd eat only fruit.  Isn't there such a thing as a fruitarian? So even though she adamantly told me she was finished with her dinner, she was happy to eat a bowl of grapes as dessert to her not-eatten dinner.
    We are visiting my in-laws right now and her Poppy nervously asked, "Does she often not eat anything for a meal?"  I guess that depends on how you define often.  More than once a week?  Probably.  What's a mom to do?  Just grin and hope that her child doesn't grow up to be a meal-skipping anorexic.  I can't force the kid to eat and I'm not going to resort to offering her unhealthy foods so she'll get more calories in.  Quality is much more important than quanity in my eyes.  She's growing and happy so I think we're doing okay. 
  That doesn't mean that I don't get incredibly happy when I find something that she loves and will happily eat.  That brings me to the topic of today's post.  (Sorry about that drawn-out intro.)  I am completely, head-over-heels in love with Gena's Avocado, Chocolate, and Sweet Potato Pudding
  
Side Note:  If you haven't checked out her raw food blog, you need to.  I am not a raw foodist, but know that it can be extremely beneficial to incorporate raw food into our diets.  And everything I've tried from her site has been delicious.

   Remember how I told you Meghan's not so big into orange veggies?  It's difficult to get her to eat them at all.  This was not difficult to get her to eat.  She loved every bite and immediately asked for more when she finished her first bowl.  I totally admit that while pudding is usually thought of as a dessert, this was more like her main course for lunch.  She wasn't eating much of the other things I offered her, so I decided to go ahead and let her try the pudding I made earlier.   She gobbled it up so quickly and enthusiasticly that I knew this would be a new go-to dish.  A bonus is that I love it, too.  With the simple sugars that come from the dates, I think I'll use it more as a dessert than a main course, but won't feel bad if it's the main course once in a while. 

   As I mentioned before I am at my in-laws so don't have access to my regular picture-editing software, so these pictures might not be the greatest, but I still want to share Meghan eating her pudding. 
Let me try this stuff....
Woah, this is good.
The enthusiastic bite!
Messy baby. :-)